I. Adding a New Device
1. Network Connection:
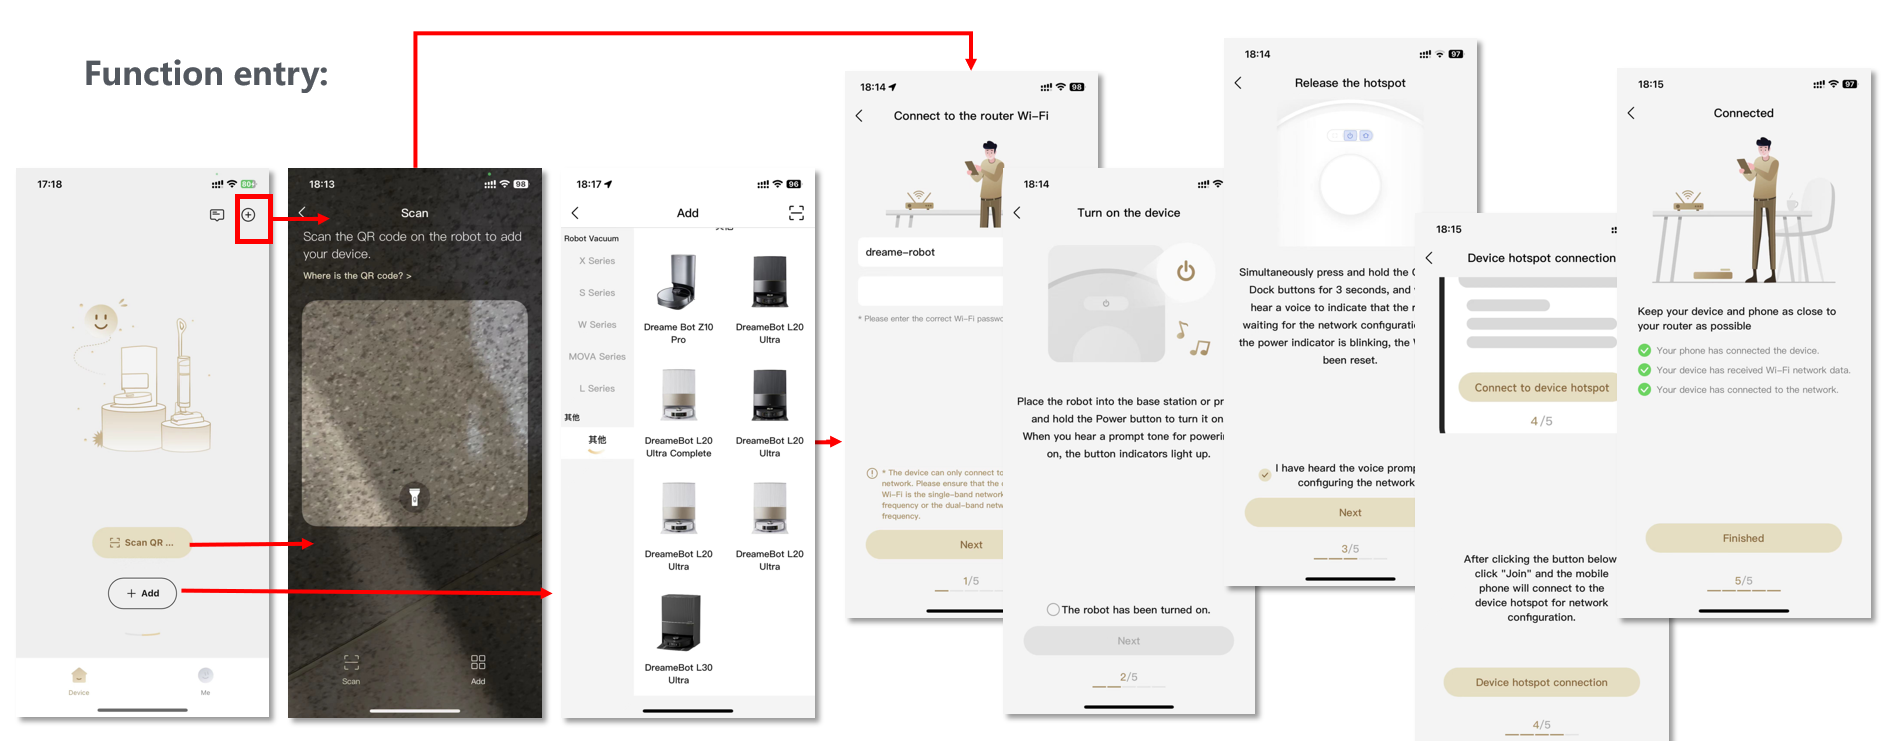
To start controlling your robot with the app, it's essential to connect it to the same Wi-Fi network as your app.
2. Connection Methods:
You have the flexibility to connect your device by scanning a QR code or by manually adding nearby devices.
Connection Process:
For a detailed walkthrough on connecting the DreameBot L10s Ultra, refer to the accompanying screenshots for visual guidance.
II. Instant Control and Shortcuts
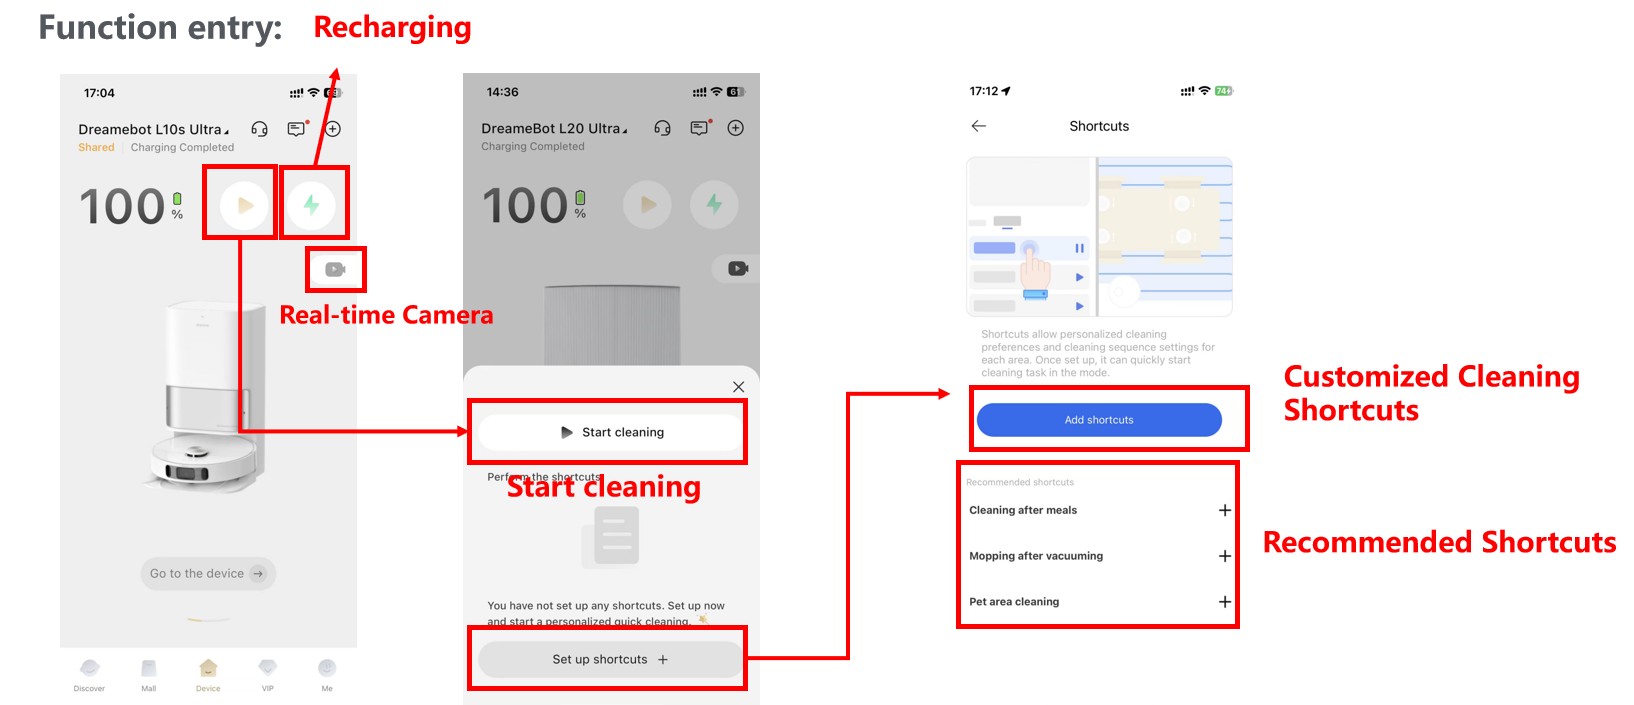
For immediate control over your robot vacuum, simply tap the device shortcut button located on the device's page within the app.
III. Device Management
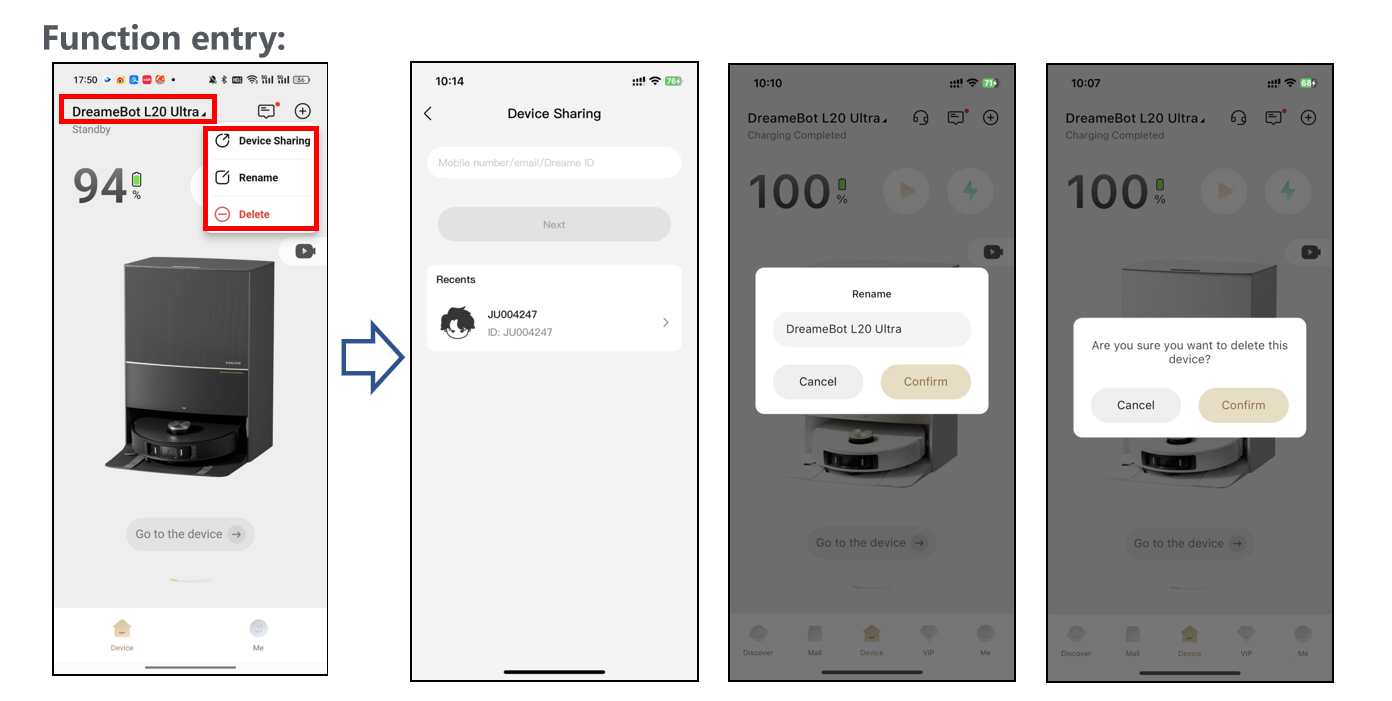
The device page is your hub for managing your robot. Here, you can:
- Share the Device: Grant access to family or friends, making it easy for everyone to control the robot.
- Rename the Device: Customize the device name for easier identification and personalization.
- Delete the Device: Remove the device from your account if it's no longer needed, keeping your network organized.
IV. Device Messages
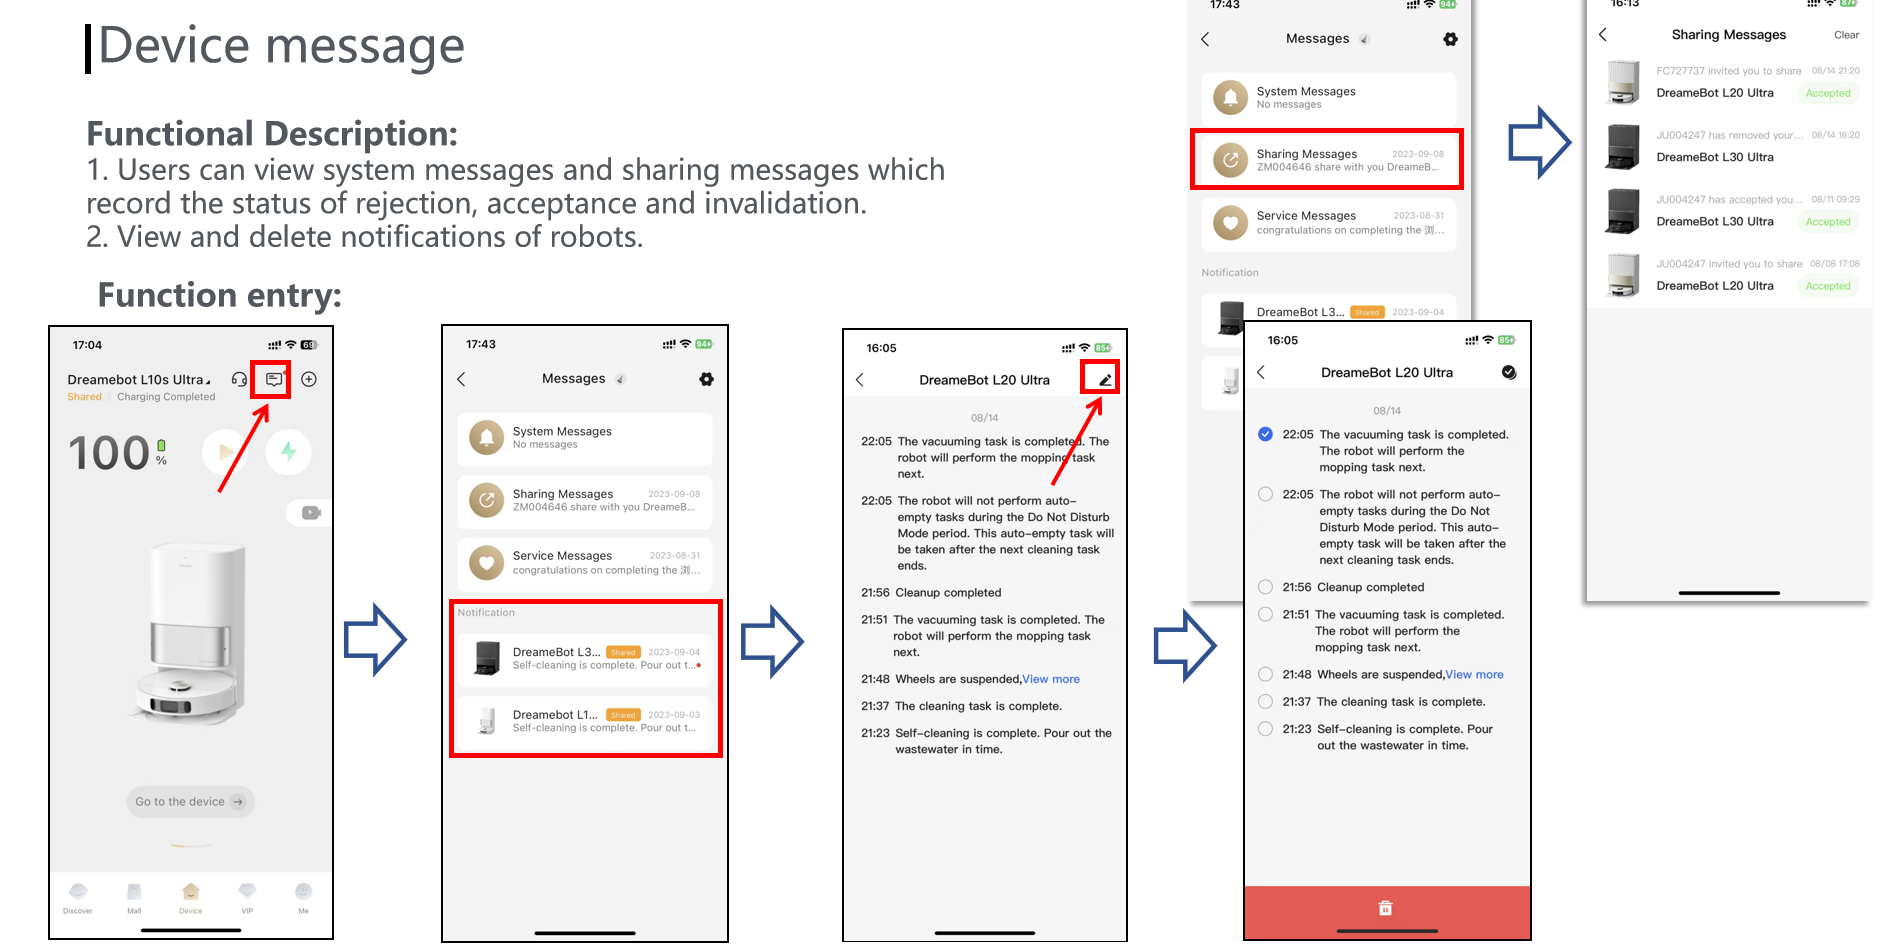
1. View Notifications:
Stay informed with system and sharing messages that log the status of device interactions. These messages include details on rejections, acceptances, and invalidations, ensuring you're always up to date.
2. Manage Alerts:
Customize your notification experience by accessing and deleting alerts from your robot as needed. This allows you to curate the information you receive and maintain control over your device's communication.
By following this quick guide, you'll be able to connect, control, and manage your devices with ease, making your smart home experience more enjoyable and efficient.

Comments
0 comments
Please sign in to leave a comment.