Installing your 2-in-1 Charging & Storage Mount for your V-series or T-series device? Here's a straightforward guide to help you set it up right!
📍 Step 1: Choose the Perfect Spot
- Find a cool, dry place near an electrical outlet.
- Ensure there are no electrical wires, pipes, or other obstructions behind the installation area.
📏 Step 2: Measure and Mark
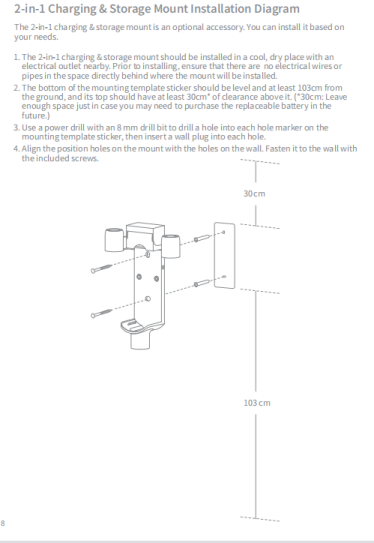
- The bottom of the mount should be at least 103 cm from the ground.
- Leave at least 30 cm of clearance above the mount for easy access and future battery replacements.
👷♂️ Step 3: Drill Holes
- Use a power drill with an 8 mm drill bit to drill holes at each marker on the provided mounting template sticker.
- Insert wall plugs into each hole.
🔩 Step 4: Attach the Mount
- Align the position holes on the mount with the holes you drilled in the wall.
- Secure it with the included screws.
🔋 Step 5: Connect Your Device
- Once your mount is securely fastened, attach your V-series or T-series device.
📋 Note:
- For V-series and T-series devices.
- Always follow the manufacturer's guidelines for your specific model.
- If you're unsure about any step, consult with a professional.
🎉 Conclusion
That's it! Your 2-in-1 Charging & Storage Mount is now ready to keep your device charged and looking sleek. This installation process ensures your device will be within easy reach while keeping the area neat and tidy. Enjoy the convenience and efficiency of your new wall mount!

Comments
0 comments
Please sign in to leave a comment.