Introduction: If your home spans multiple floors, why should your cleaning routine be limited to a single level? With our robots, you can effortlessly create a multi-floor map to ensure every nook and cranny is spotless. Follow this graphic guide to set up your multi-floor cleaning strategy.
Step-by-Step Guide to Creating a Multi-Floor Map:
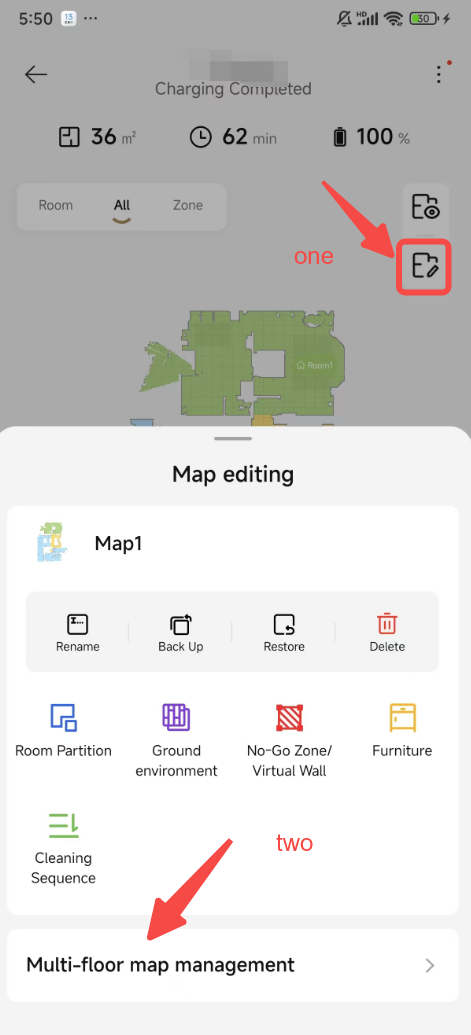
Step 1: Access Map Editing
- Go to the Device Homepage: Start by navigating to the homepage of your L20, L30, X30, or X40 series robot.
- Enter Map Editing Mode: Locate and click on the 'Map Editing' option to access the map management tools.
- Select Multi-floor Map Management: In the pop-up window, choose 'Multi-floor map management' to begin setting up your multi-floor map.
Step 2: Configure Map Settings
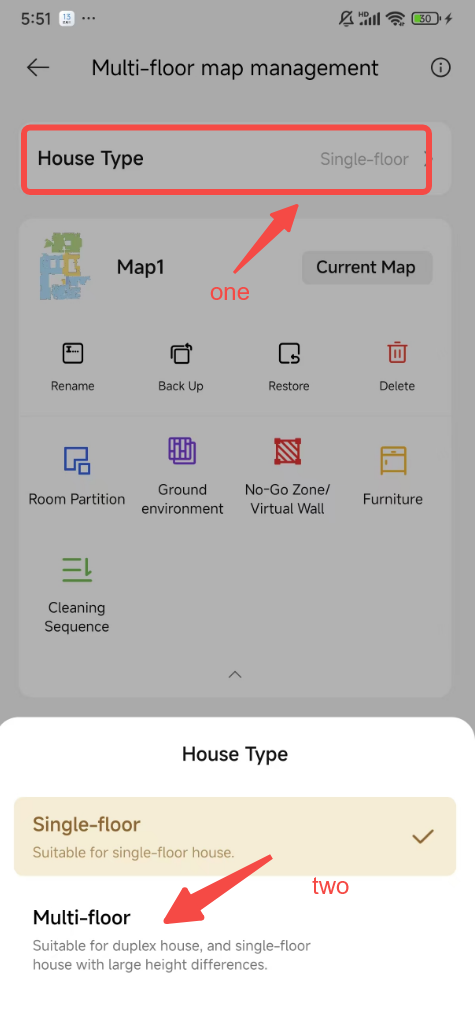
- Set House Type: Click on 'House Type' and select 'Multi-floor' to indicate that your home has multiple levels.
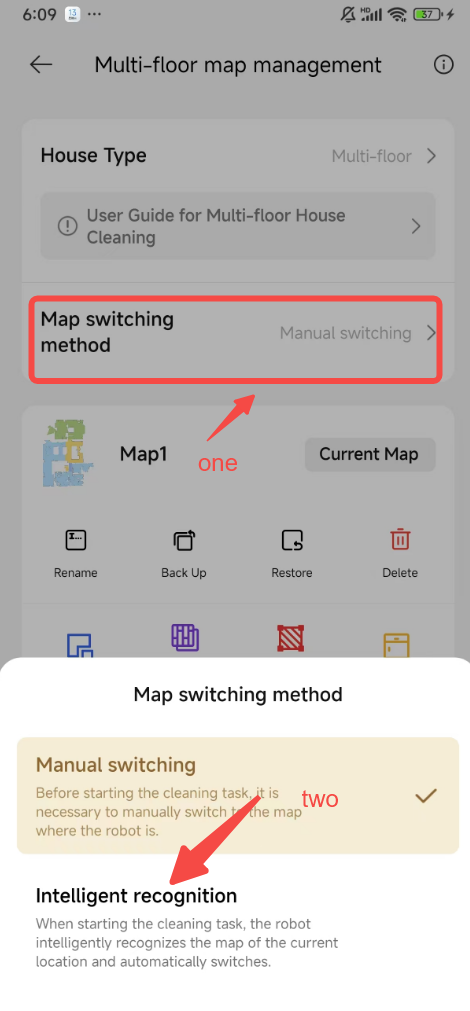
- Choose Map Switching Method: Next, click on 'Map switching method' and set it to 'Intelligent Recognition'. This will allow your robot to automatically switch between maps based on its location.
Step 3: Create and Customize Your Map
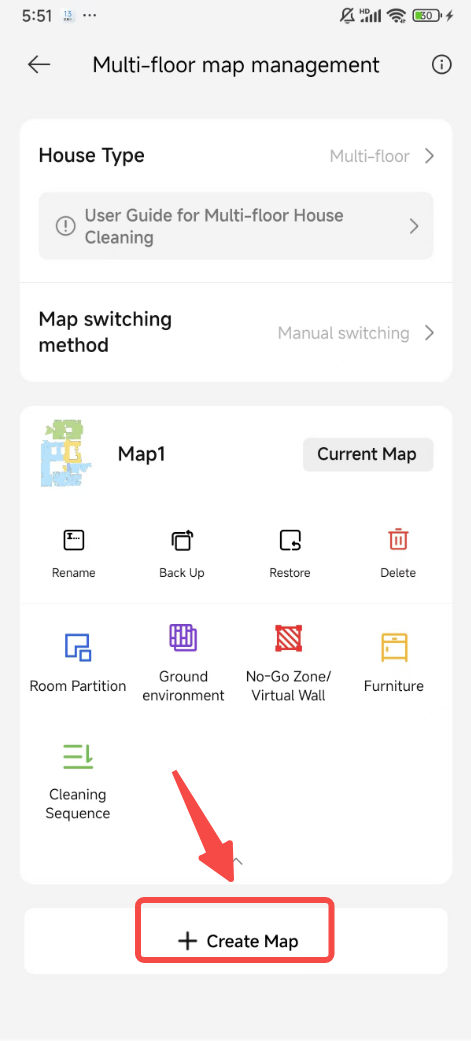
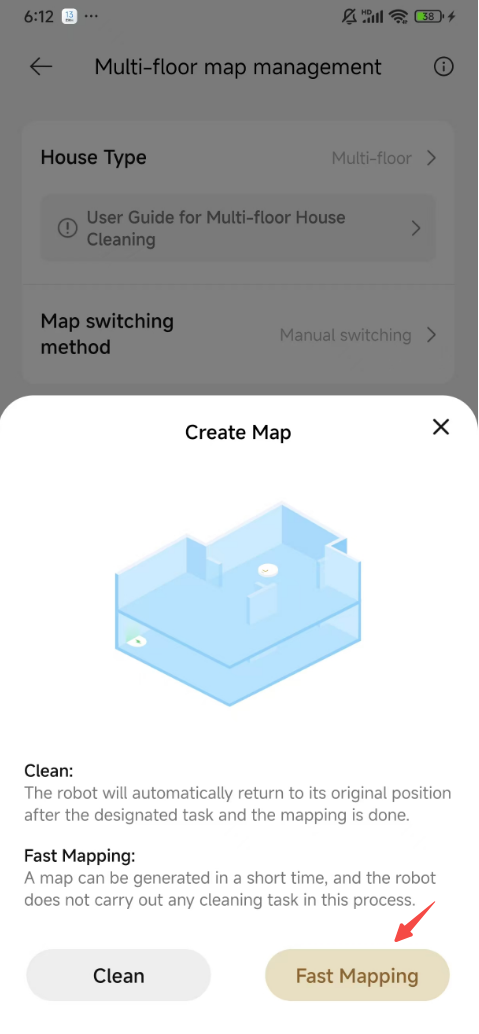
- Initiate Map Creation: Click on 'Create Map' to start the process of creating a new map.
- Select Fast Map: Choose 'Fast Map' to quickly generate a multi-floor map that covers all the levels of your home.
Conclusion:
Creating a multi-floor map for your L20, L30, X30, or X40 series robot is a simple process that can greatly enhance your cleaning efficiency. By following these steps, you can ensure that your robot is equipped to tackle the entire house, floor by floor. If you encounter any issues or need further assistance, our support team is always ready to help.

Comments
0 comments
Please sign in to leave a comment.