Introduction: Customizing your maps and room names can make navigation a breeze, especially in multi-floor settings. Whether you're distinguishing different floors or labeling specific rooms, we've got you covered with these simple steps.
Rename a Map:
There are two easy methods to rename a map on your L20, L30, X30, or X40 series device.
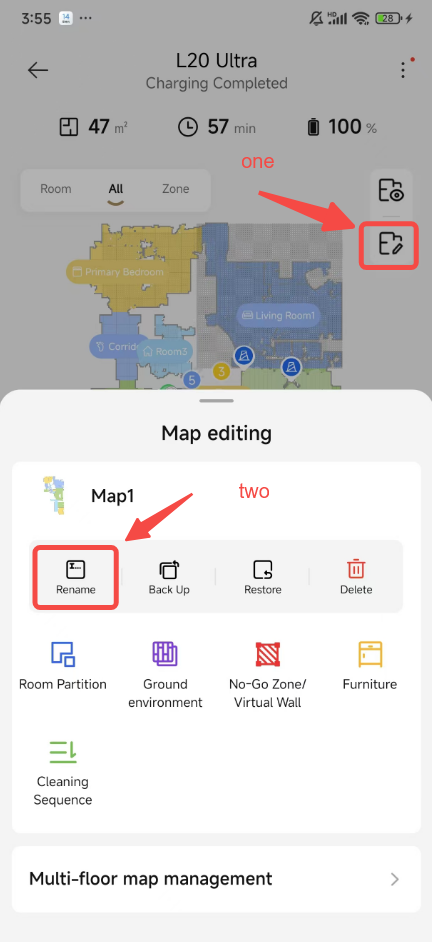
Method 1: Quick Rename
- Access Map Editing: Tap on the 'Map Editing' option in your device's interface.
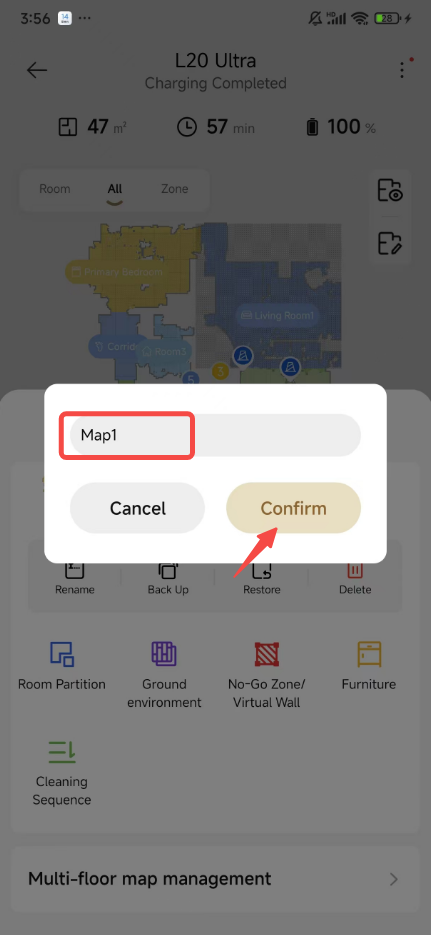
- Rename the Map: Look for the 'Rename' button and tap it to change the map's name directly.
Method 2: Multi-floor Map Management
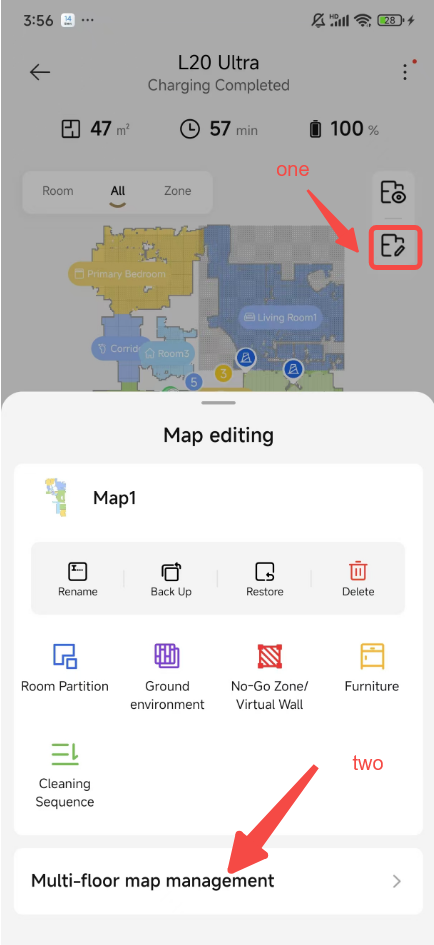
- Enter Map Editing Mode: Go to 'Map Editing' and select 'Multi-floor map management'.
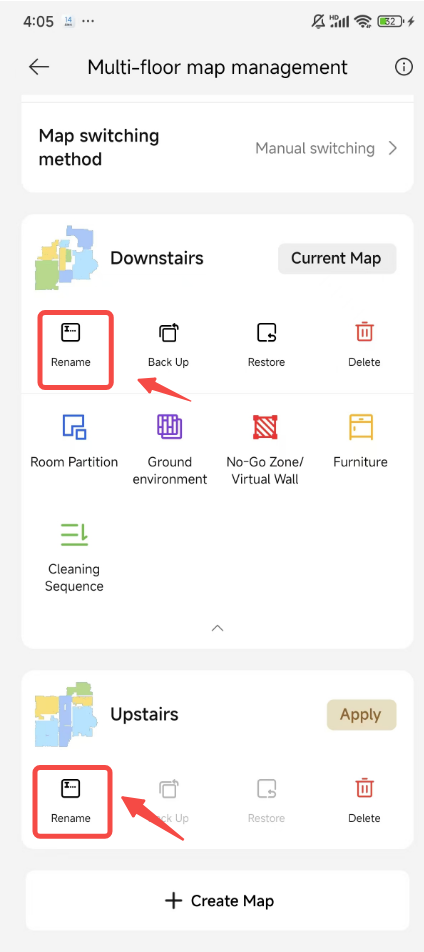
2. Select and Rename: Swipe through the maps until you find the one you want to rename, then tap 'Rename' to update its name.
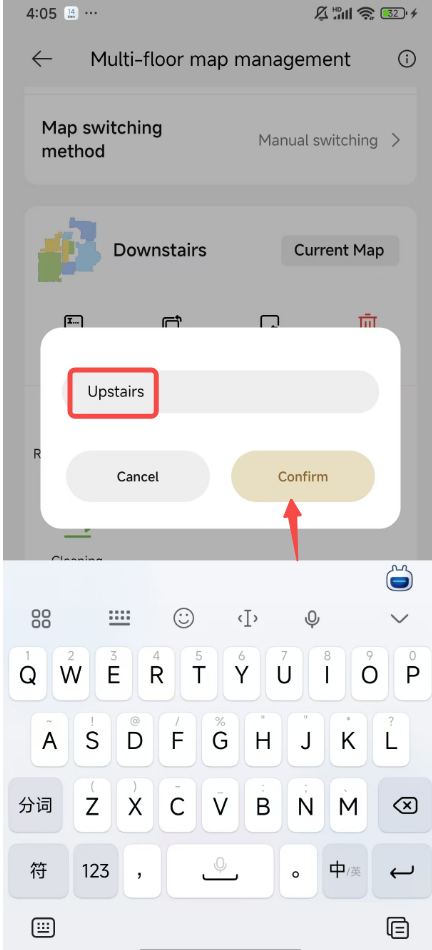
Rename a Room:
Follow these straightforward steps to rename a room on your device.
Step 1: Access Room Partition
- Tap on Map Editing: Navigate to 'Map Editing' in your device's menu.
- Select Room Partition: Choose the 'Room Partition' option to start the renaming process.
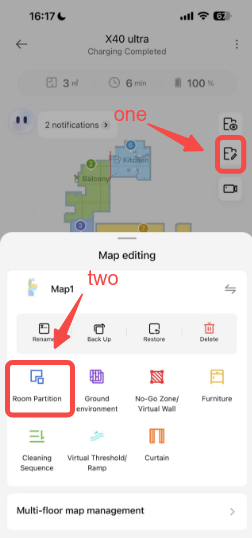
Step 2: Select and Rename the Room
- Choose the Room: Pick the room you wish to rename from the list.
- Tap Rename: Tap the 'Rename' button and enter the new name for the room.
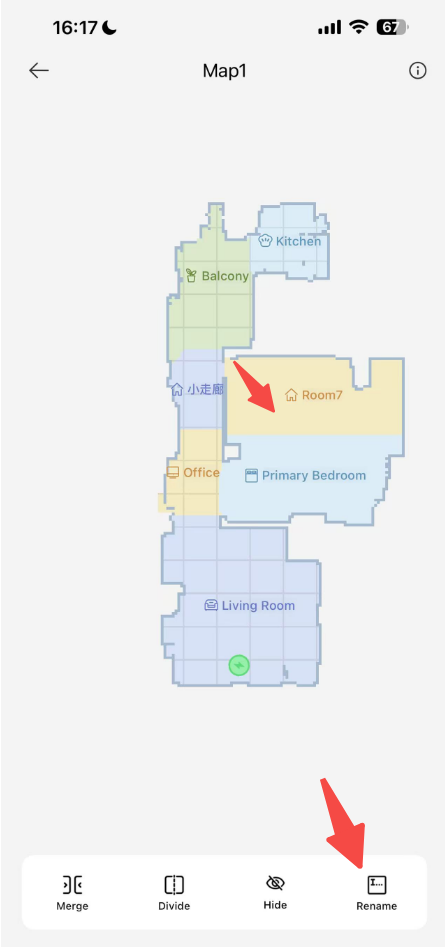
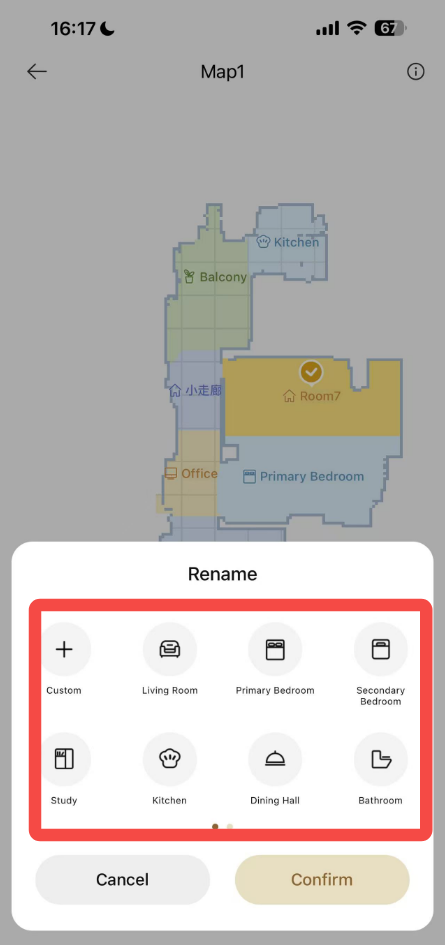
⚠️ Important Note:
- Only the main user account has the permission to rename rooms. If you're a shared user, you won't have this capability.
Conclusion:
Renaming maps and rooms on your L20, L30, X30, or X40 series device is a quick and easy process. With these steps, you can personalize your maps for better organization and easier navigation. If you have any questions or need further assistance, don't hesitate to reach out to our support team.

Comments
0 comments
Please sign in to leave a comment.