2.1App Settings You Should Know: Make the Most of Your X60
If you've just unboxed your X60, the companion app can feel like a lot at first glance. There are menus inside menus, toggles for nearly every function, and a handful of AI-powered extras that aren't immediately self-explanatory. This guide breaks down the app, section by section, so you know exactly what each setting does and where to find it.
Home Screen & Search Tips
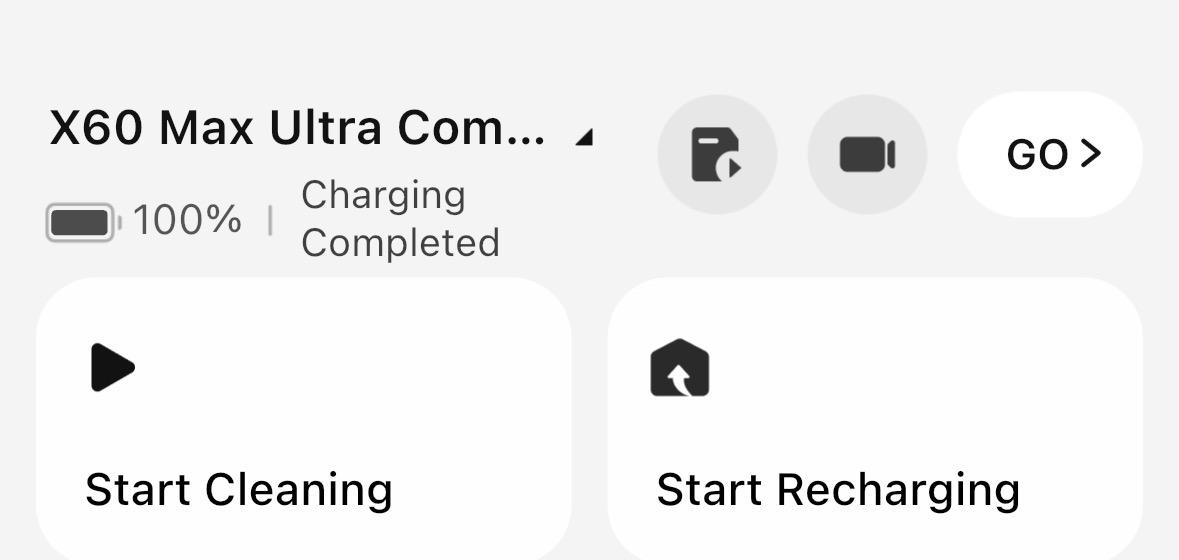
When you open the Dreamehome app and select your X60, you'll land on the main control screen. This shows your robot's current status (charging, cleaning, idle, etc.) and gives you quick access to the most-used functions:
Start Cleaning & Start Recharging: the two primary action buttons at the bottom of the screen
Shortcuts: a button for saved cleaning routinfes
Live Video: a camera icon that lets you patrol your home in real time
GO: tapping this (or the image of the robot itself) opens the full device settings menu
From here, everything else in the app branches out from 3 icons: the settings gear, the map icon, and the camera icon, plus the cleaning controls below the map view.
Map Editing & Display
Tapping the map icon opens 2 tabs:
Map Display controls what you see, which icons appear on the map, and whether you're viewing in 2D or 3D (with the option to rotate 90 degrees).
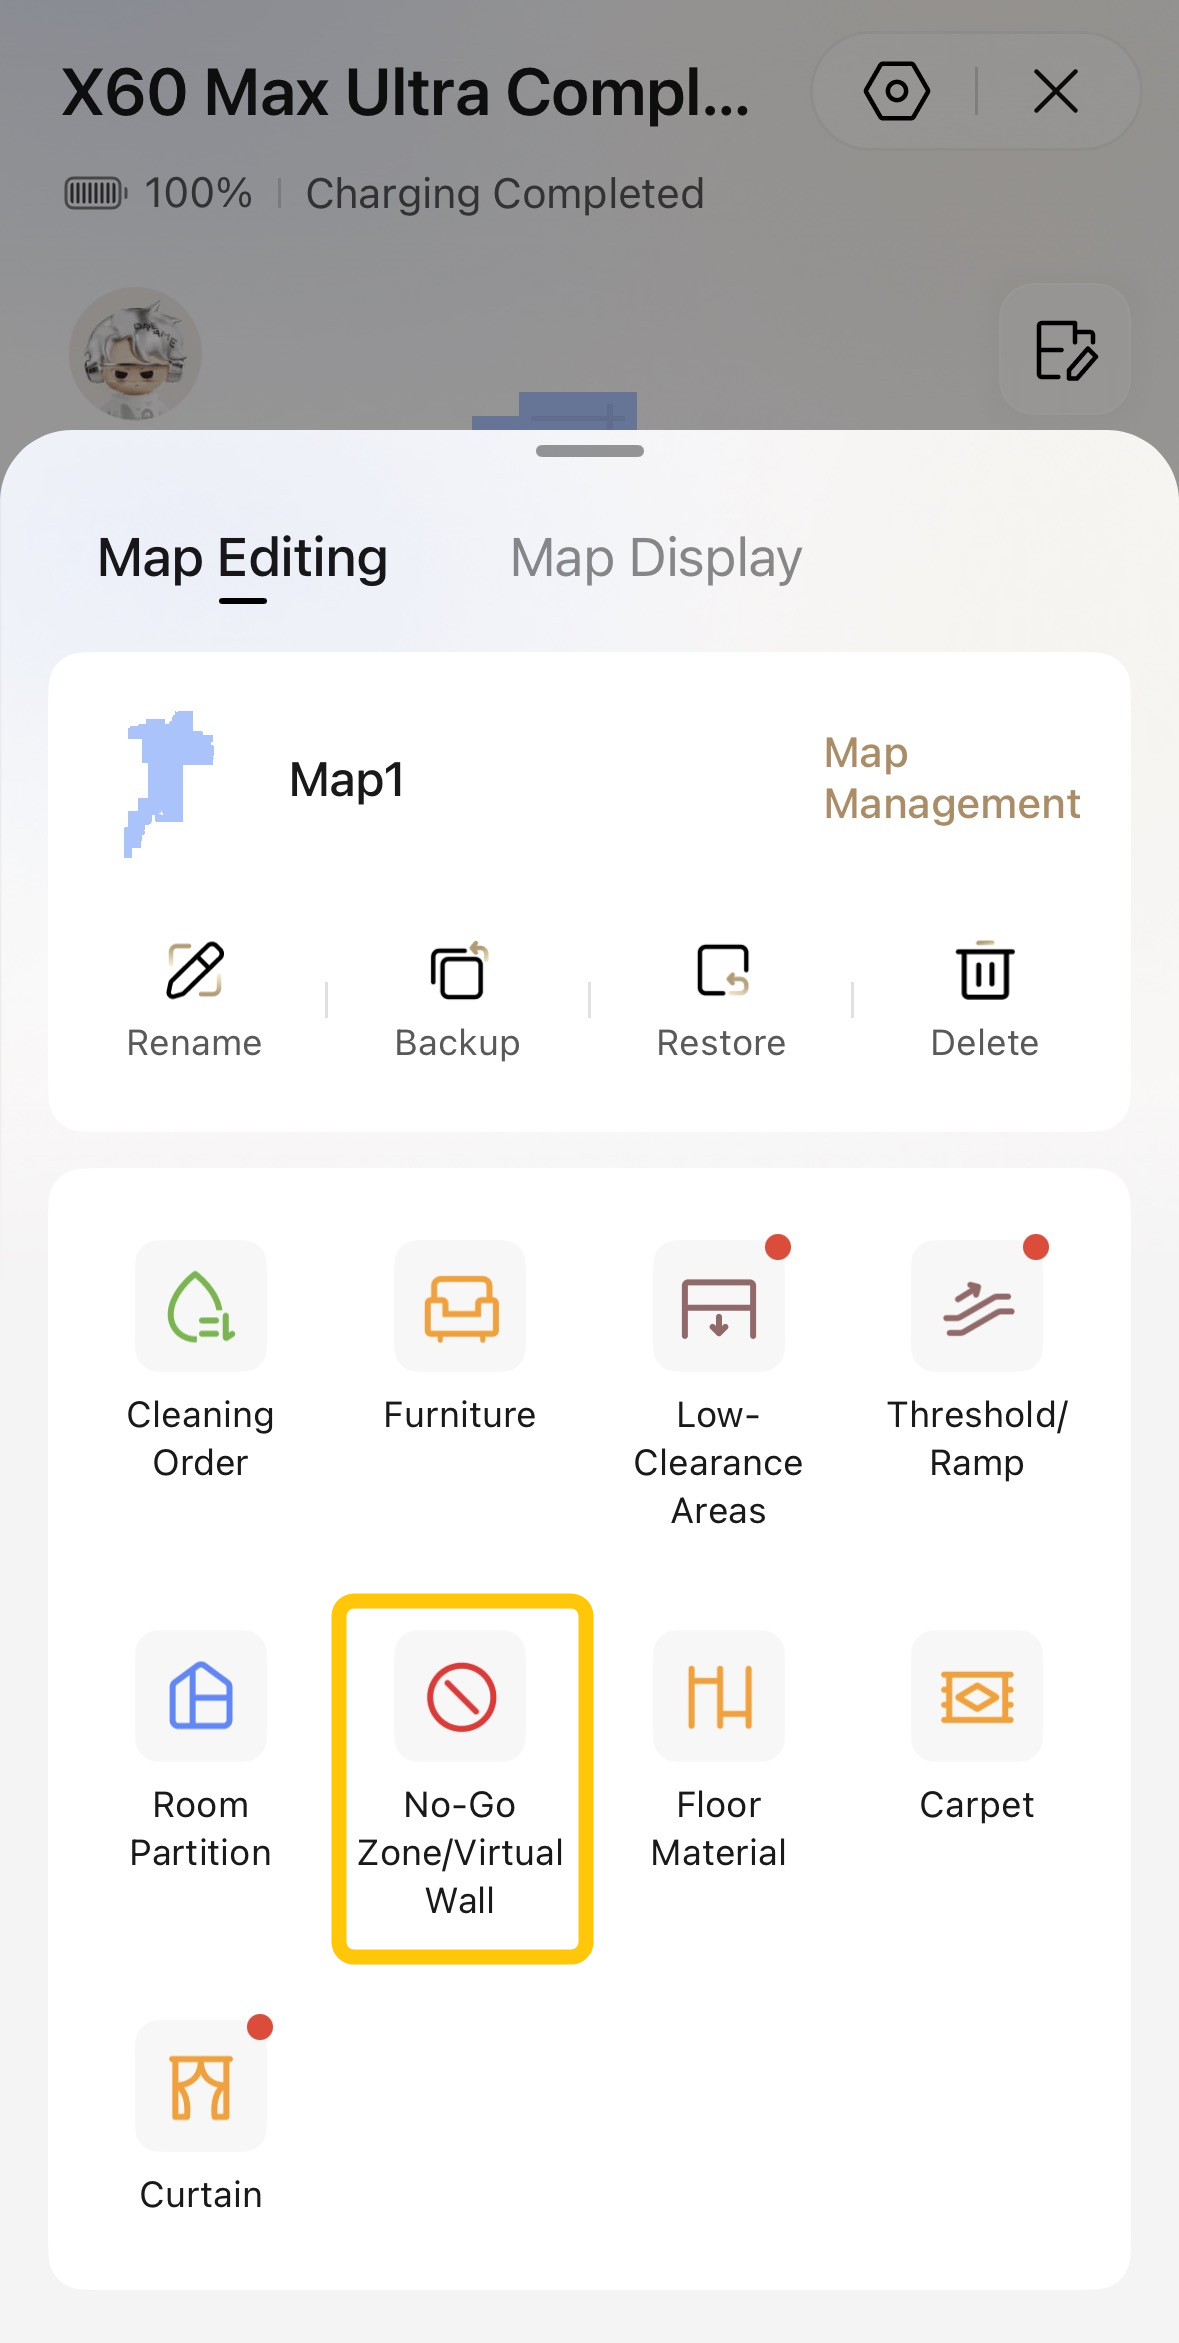
Map Editing is where real customization happens. You can rename, back up, restore, or delete maps, reorder which rooms get cleaned first, and mark furniture locations. Other tools include:
Low-clearance area tagging, so the robot lowers itself appropriately
Passable/impassable threshold marking, plus ramp identification
Room partitioning — merge, divide, hide, or rename rooms
No-go zones and no-mop zones, plus virtual walls (all drag-and-drop)
Floor material and carpet tagging
Curtain identification, so the robot attempts to clean underneath rather than avoiding or getting tangled
Next to the map name, a separate Map Management button lets you set your house type (single or multi-floor), choose whether floor-switching happens automatically or manually, and run fast mapping to generate a brand-new map.
💡The search icon in the top-right corner under the settings menu lets you jump directly to any setting by name instead of digging through menus.
💡Most settings here are about personal preference and household conditions rather than a strict "right" answer—things like water temperature, cleaning frequency, and carpet handling should be tuned to your specific home and how many pets you have.
How to Schedule Cleaning?
Under the settings gear, the Schedule Cleaning option lets you set a cleaning time, choose which days it repeats, and specify where to clean, what to clean (vacuum, mop, or both), and how to clean. It's a one-time setup — once it's saved, the robot runs on autopilot without you needing to open the app or make commands each time.
How to Set Up No-Go Zones and Virtual Walls?
In Map Editing, you'll find No-Go Zone/Virtual Wall. Everything here is drag-and-drop: add a no-go zone and the robot won't vacuum or mop there at all, or add a no-mop zone if you just want to keep it from mopping (it'll still vacuum). Virtual walls work as straight digital boundaries you can place anywhere on the map. This same section also covers room partitioning—merge, divide, hide, or rename rooms—plus floor material tagging and curtain identification, so the robot attempts to clean under curtains instead of avoiding or getting stuck on them.
How to Do a Zone-Clean or Room Clean?
Below the map view, you'll see three tabs: Zone, All, and Room. All cleans the entire mapped space. Zone cleans only the boxes you've dragged onto the map, and you can clean the same zone up to 3 times per run. Room lets you pick one room or several, if you don't want a whole-house clean. This mode also supports cleaning up to 3 times, and you can adjust the order in which rooms get cleaned. Once you've chosen a scope, hit Clean in the bottom-left corner to start.
How to Adjust Vacuum and Mop Settings?
There are several cleaning modes: vacuum only, mop only, vacuum and mop at the same time, or mop-after-vacuum, and you can also customize this per room. Vacuum mode lets you choose suction level and route; Mop mode lets you choose wetness level (quick to deep) and route. If you'd rather not think about it, CleanGenius handles all of this automatically.
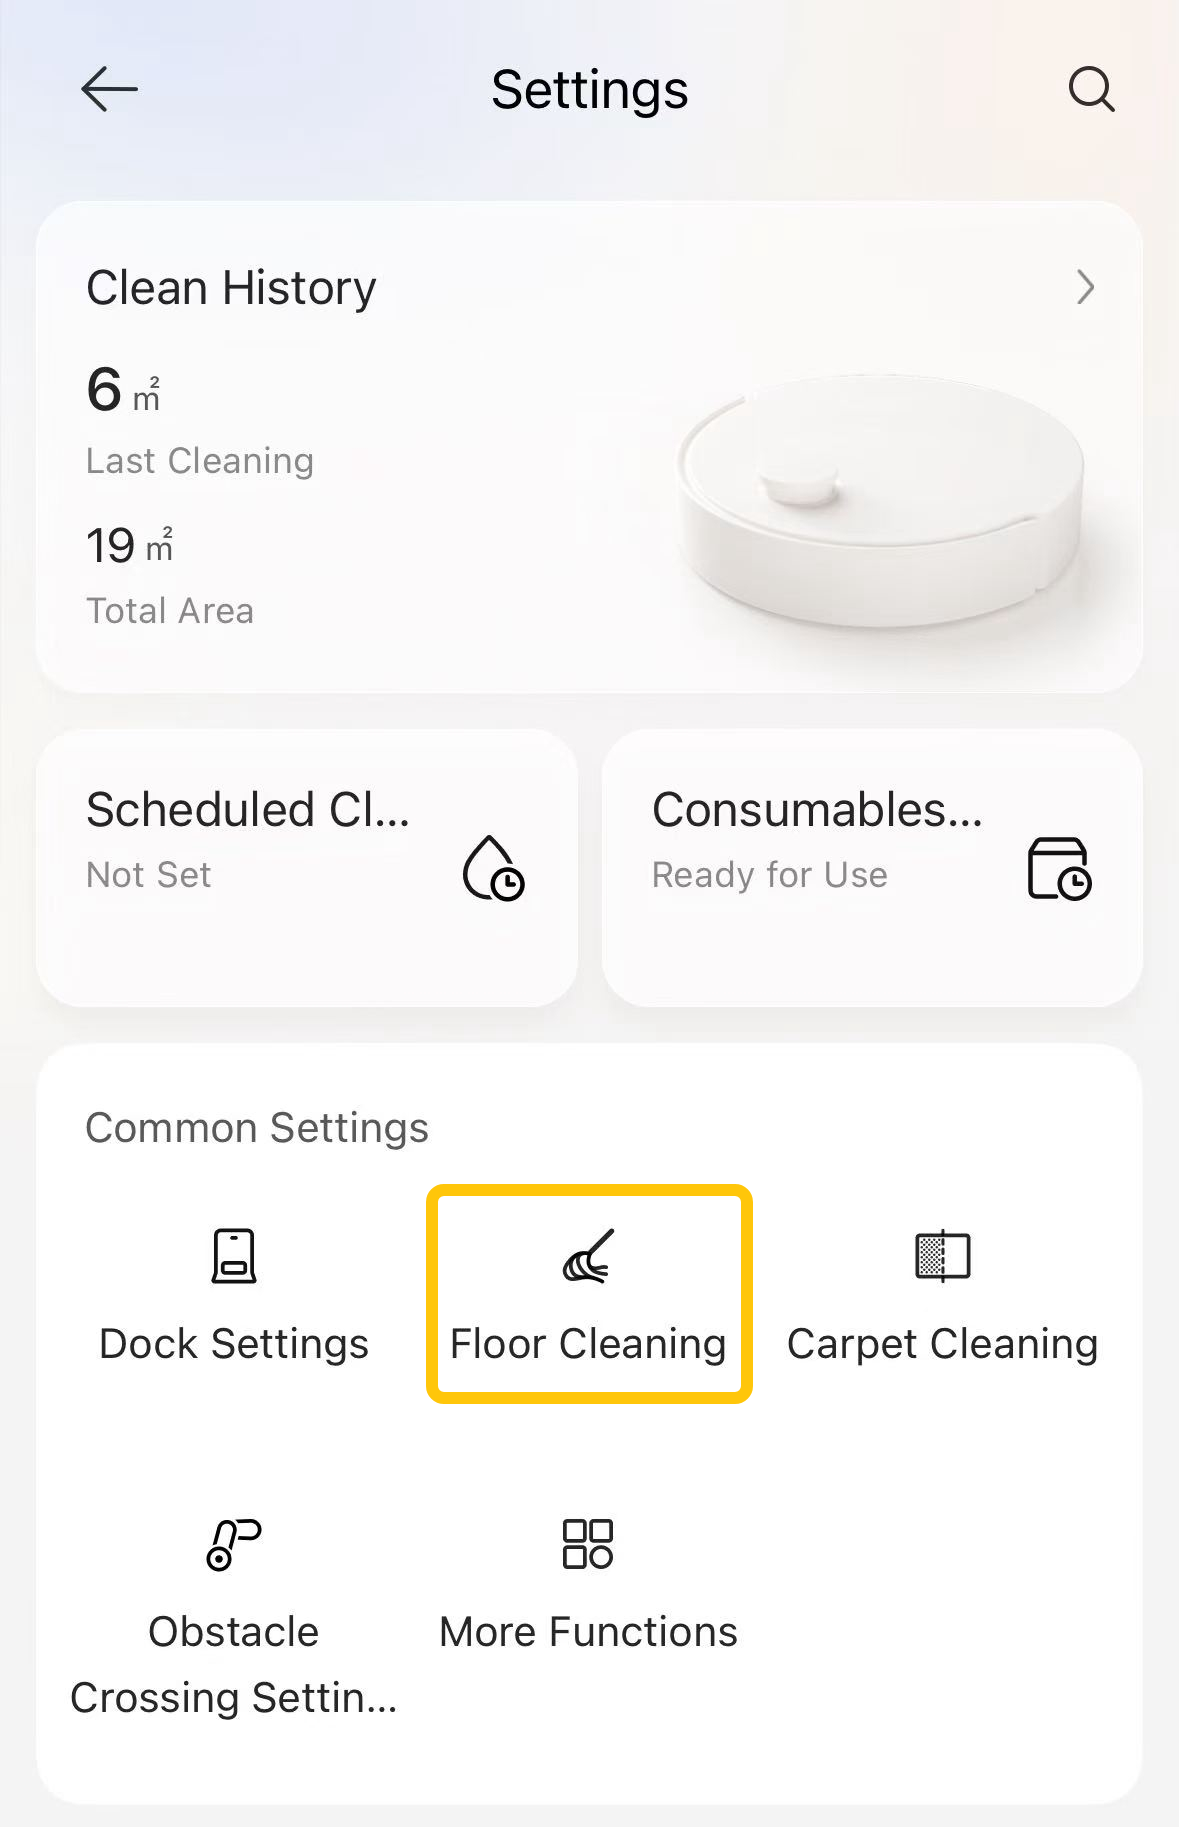
For finer control over how the robot approaches your floors, the Floor Cleaning settings cover cleaning direction to help protect your floors (along the floor seams or not), and low space cleaning with LDS auto-lifting (VersaLift, for coverage under low furniture).
How to Activate Edge and Corner Cleaning?
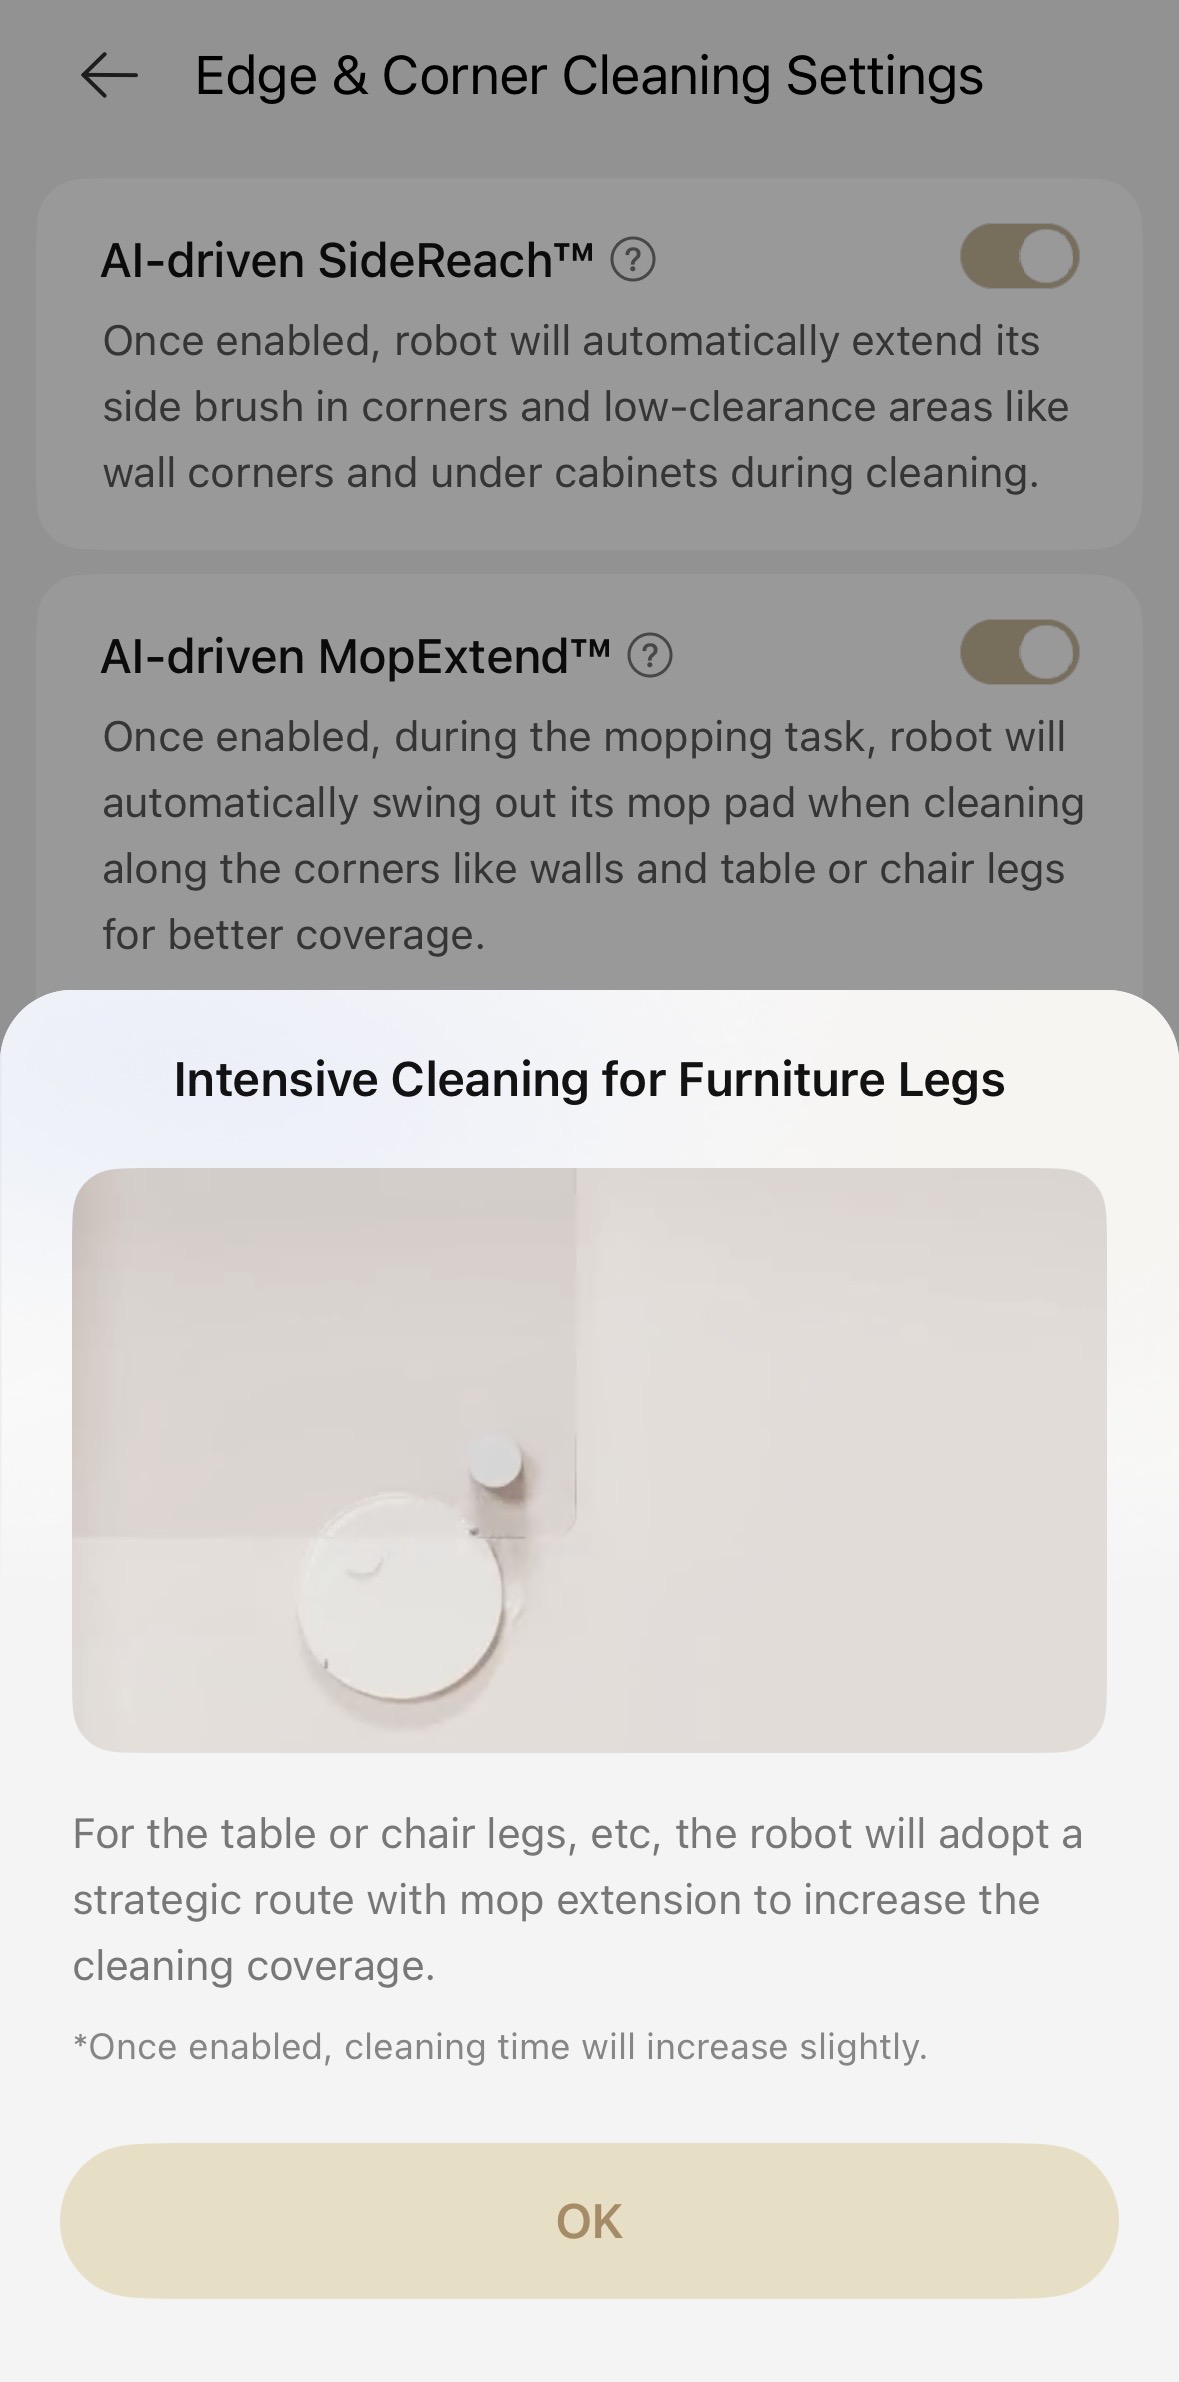
The X60 has a couple of AI-driven features built specifically for edges, corners, and furniture legs. AI-driven SideReach extends the side brush further out to grab dust along baseboards, and AI-driven MopExtend lets the mop pad protrude and wiggle into gaps it normally couldn't reach. Under MopExtend, you can also enable Intensive Cleaning for Crevices and Intensive Cleaning for Furniture Legs, with its own adjustable frequency, for spots that tend to collect buildup. You can tap the question mark next to either one for a short in-app animation showing exactly how it moves.
How to Set Up Carpet Cleaning on the Map?
Your X60 can identify rugs and mats on its own and automatically displays them on the map for every cleaning mission, applying a system-default handling strategy, so you won't need to remap each time you add or remove a rug. You can also add a carpet manually from the map editing icon and choose its handling strategy before cleaning begins. Carpets can be categorized by size (wall-to-wall fitted or small-area), by shape (round or square), and by style (high-pile, low-pile, or floor mats). For tasseled carpets, you can also mark the fringe area on the map for the X60 to avoid.
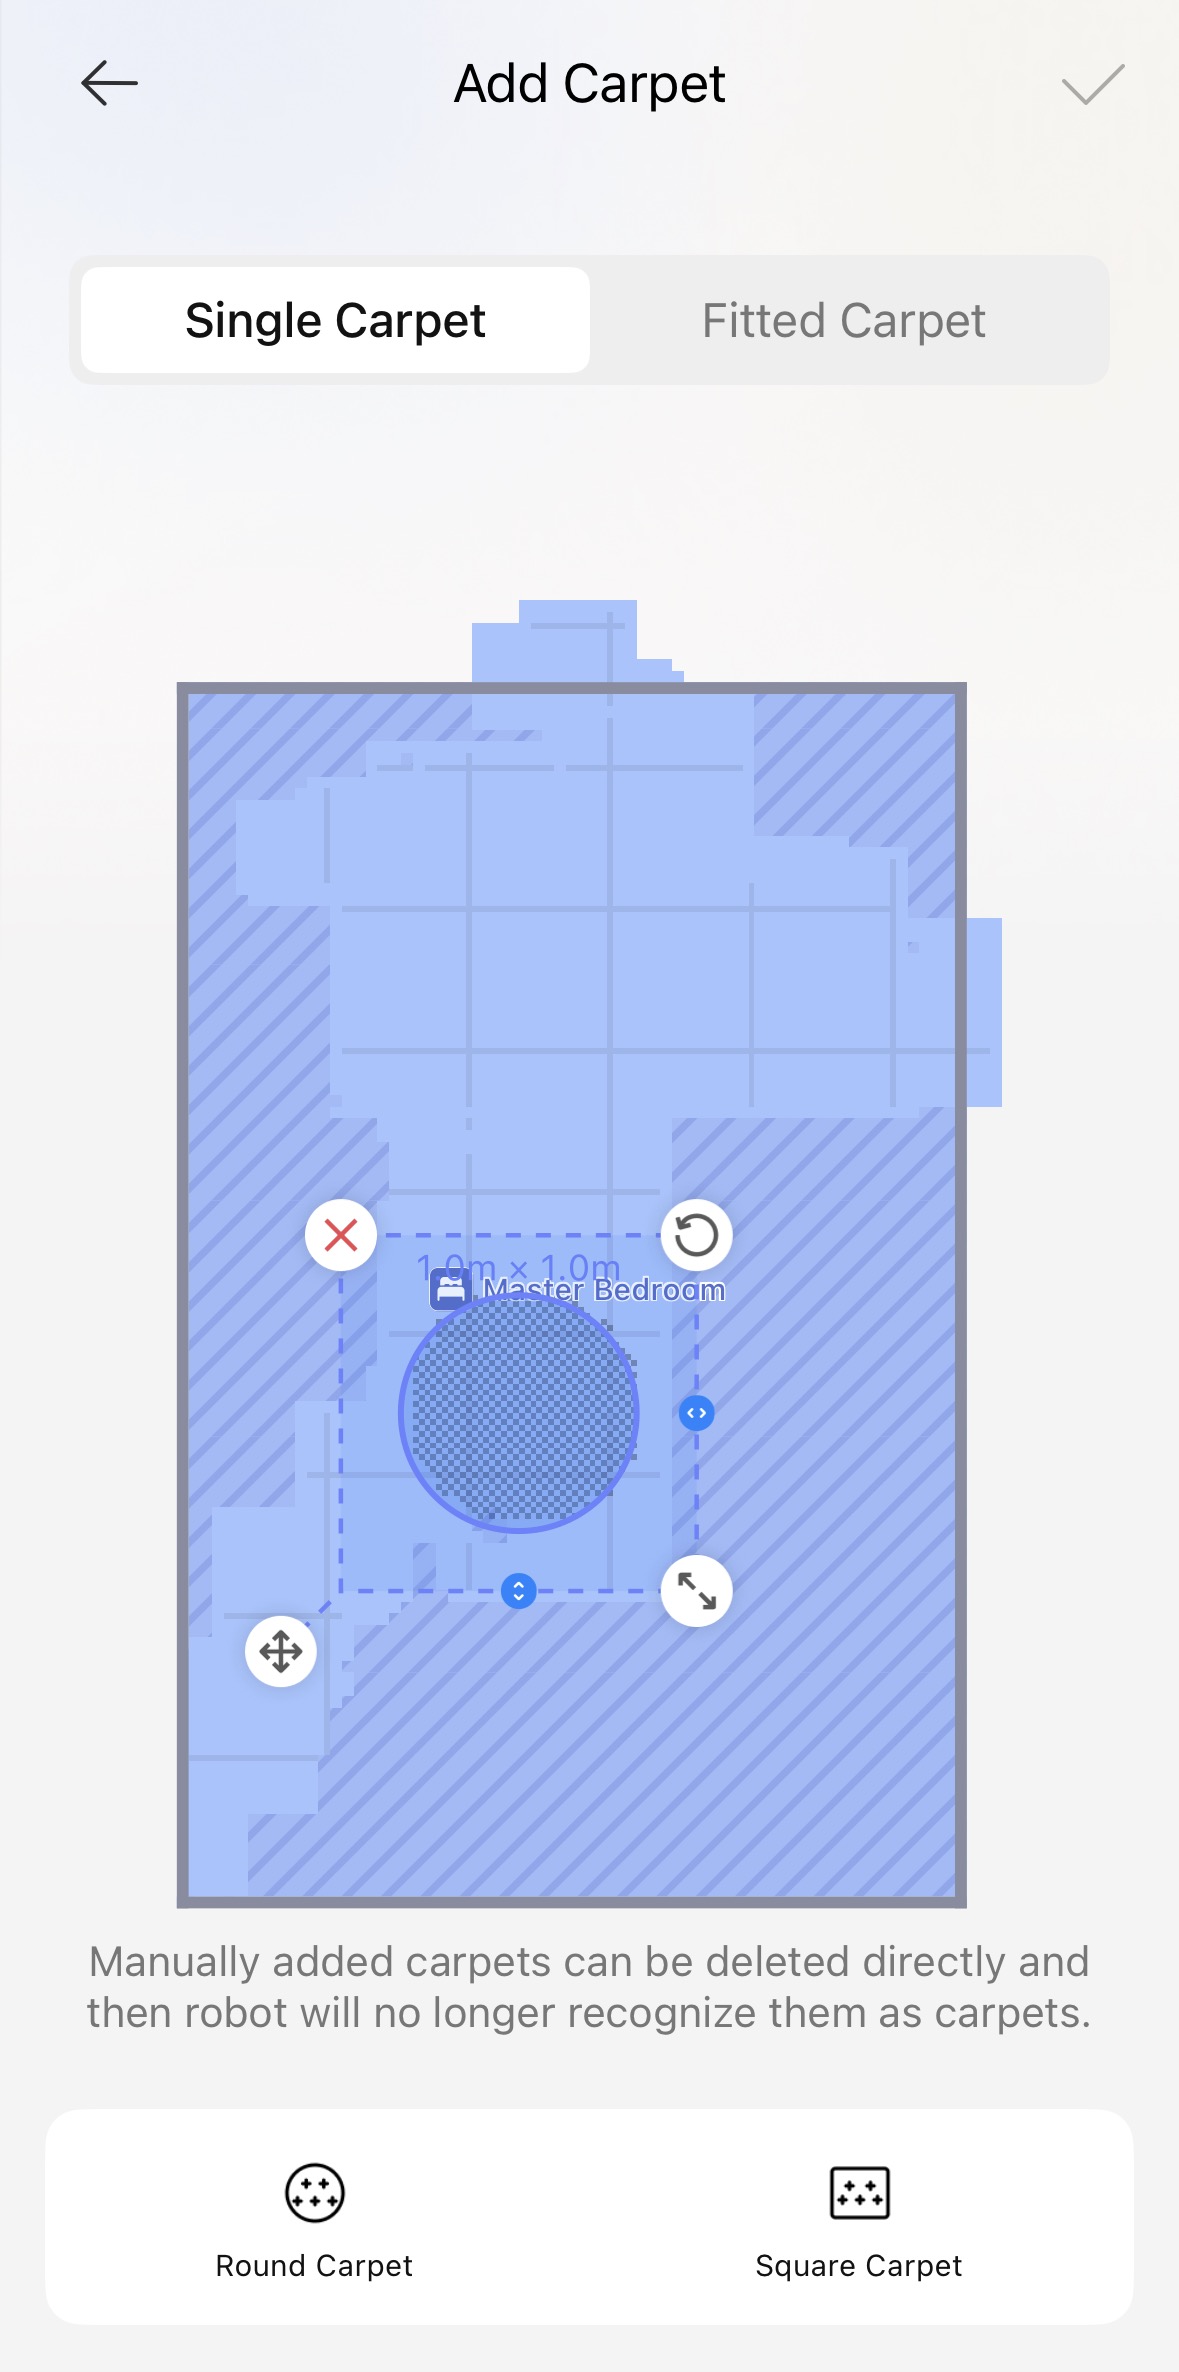
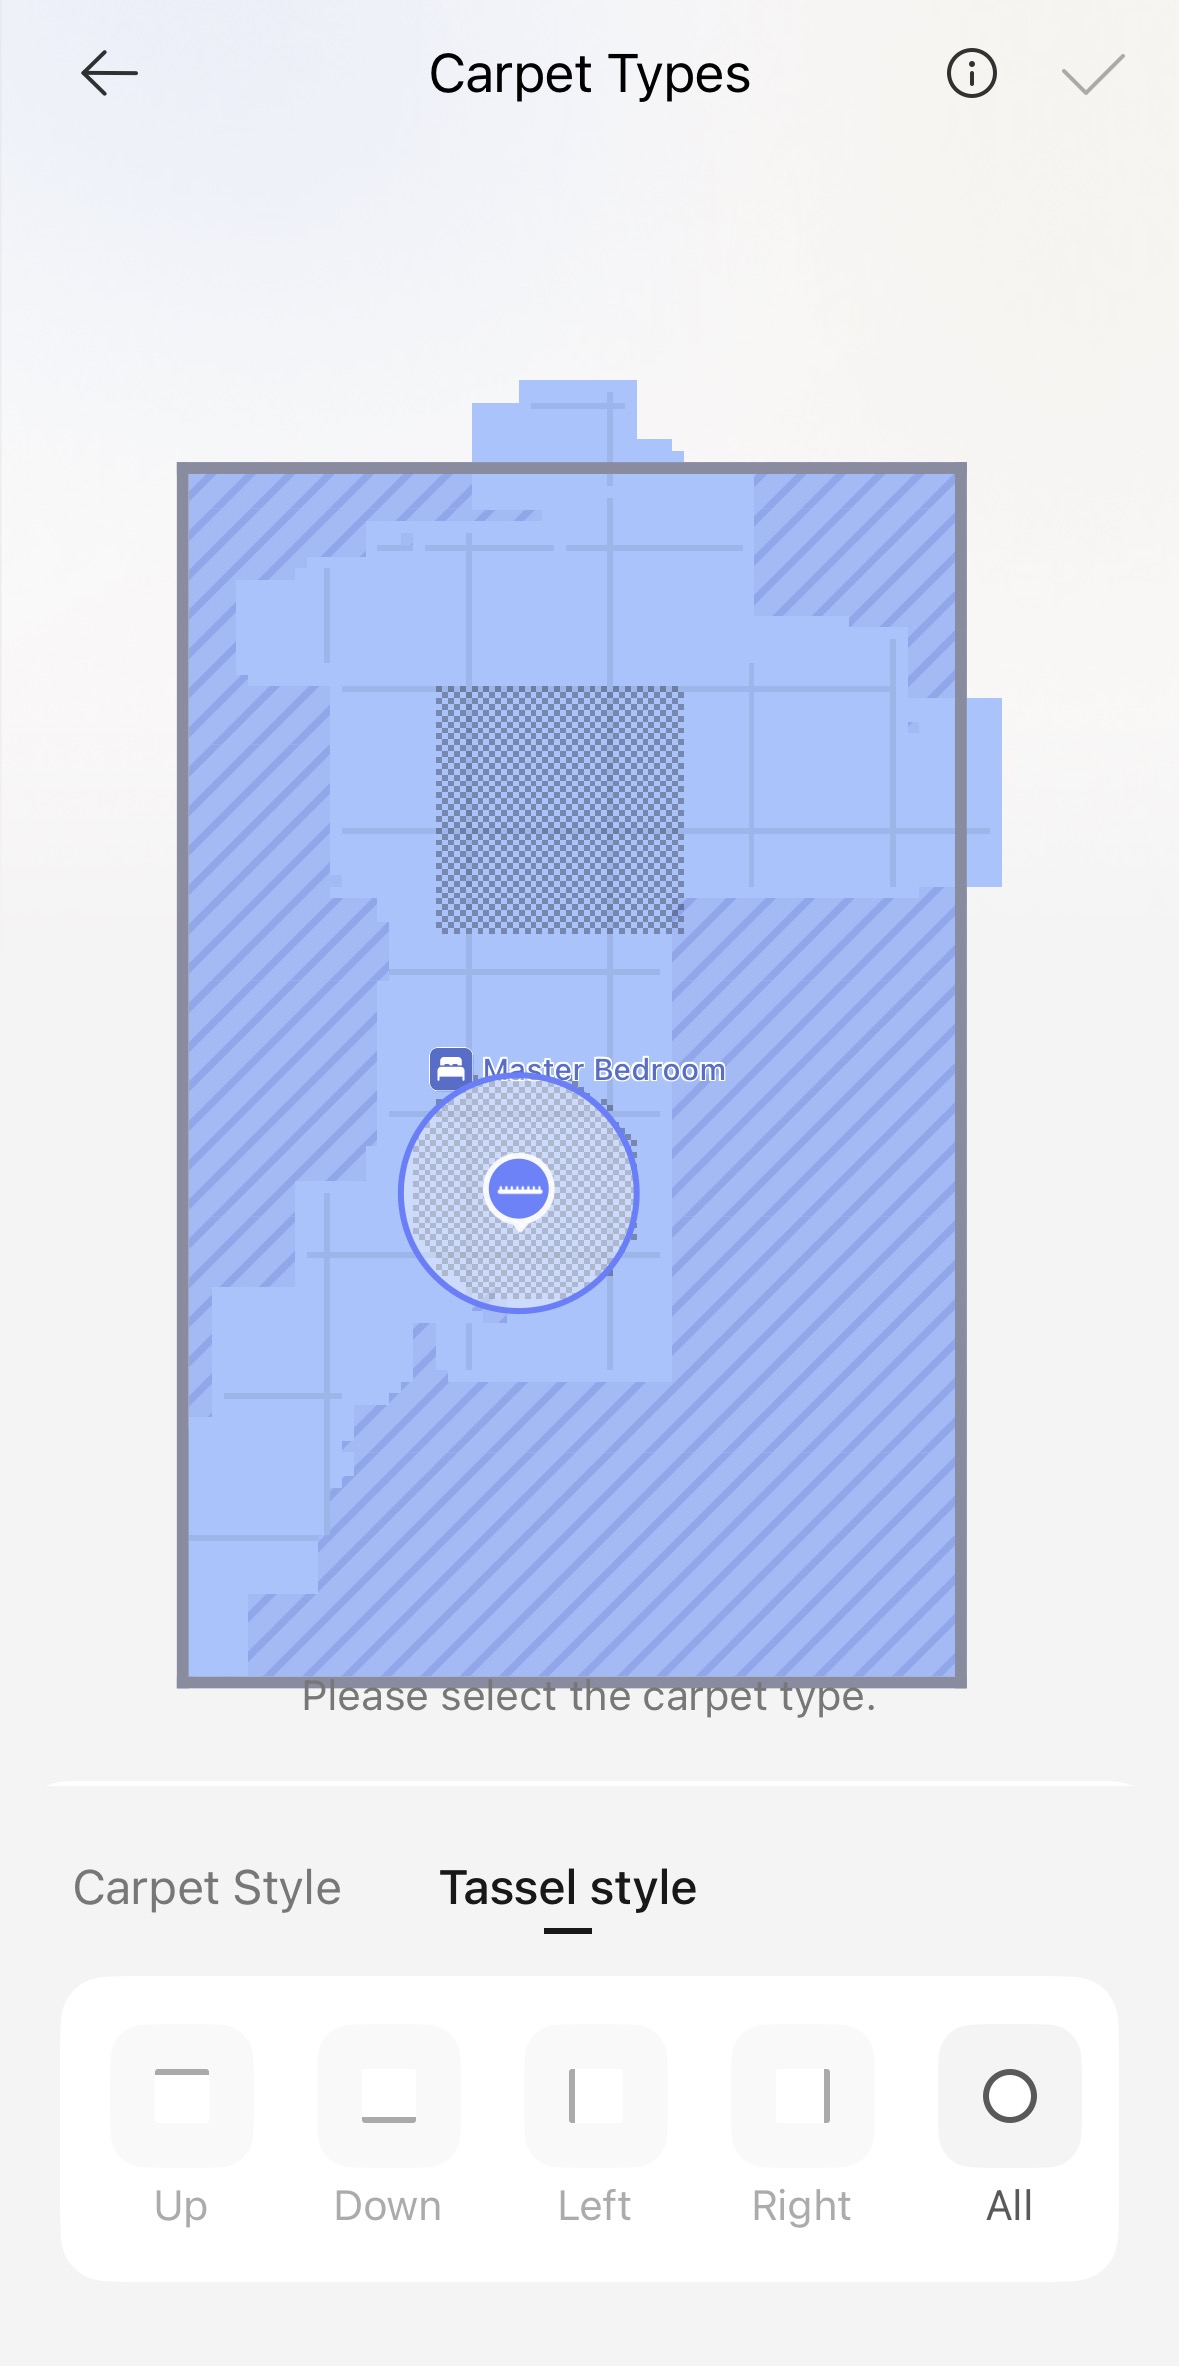
For each carpet, you can decide whether the X60 should vacuum, avoid, ignore, or cross over it. If you choose to vacuum, you can also set whether the mop pads lift or fully detach. Additional options include cleaning carpets before other areas, boosting suction on carpets, intensive cleaning with crisscross pattern passes, and chassis lifting on thicker carpets to prevent the robot from getting stuck (chassis lifting is available for X60 Max Ultra Complete only).
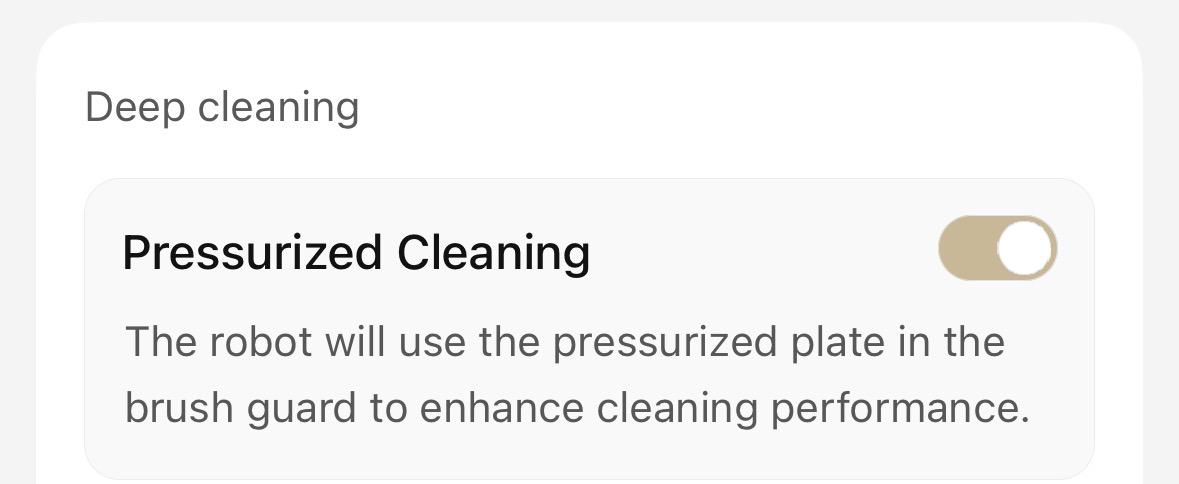
X60 Max Ultra Complete also features a retractable pressure chamber that lifts embedded debris more effectively from both carpets and hard floors. To turn it on, go to Floor Cleaning settings and enable Pressurized Cleaning.
How to Set Up Pet Care Features?
Pet Care settings live under Smart Settings and are built around two things: pet-focused cleaning and pet interaction. Before exploring either, toggle on Pet Recognition first.
For cleaning, you can enable the dust box's hair compression and high-frequency auto-empty to handle heavy-shedding days, and turn on Large Particles Boost to pick up cat litter and pet food automatically. You can also add pet areas to the map for intensive cleaning, or let the robot can generate pet hotspot reports on its own and refine them from there. If your pet has sensitive skin, Low Water Level Mopping helps reduce water stains in pet areas.
Beyond cleaning, Pet Moments captures candid photos of your pets during cleaning or cruising, so you can catch their fun moments even when you're not home. And with the camera feature turned on, the robot doubles as a security camera—check in on your pets or talk to them in real time.
How to Start and Turn Off Video Monitoring?
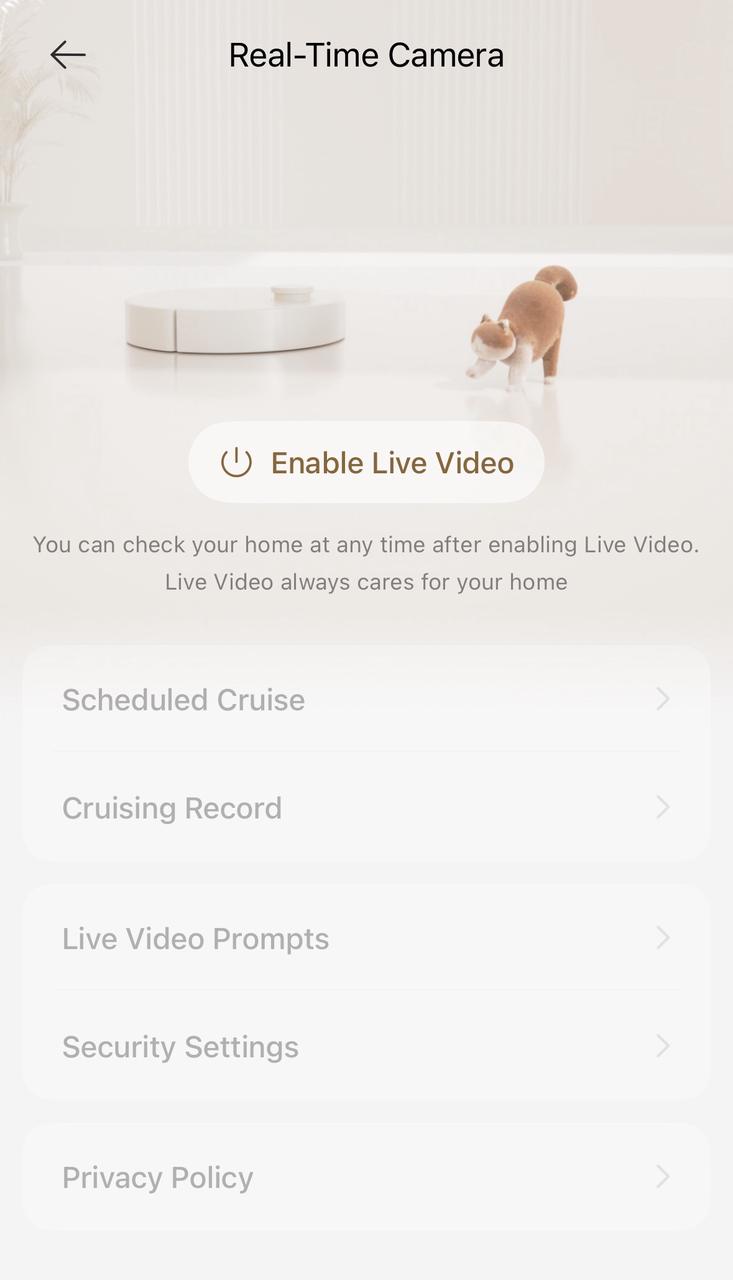
Live video is turned off by default to protect your privacy. Tapping the camera icon on the home screen or the map view opens live video monitoring, letting the robot patrol your house, take photos, and record video. The first time you use this feature, you'll need to press the dock button on the robot 3 times to enable live video. Beyond basic monitoring, deeper camera controls let you disable the camera entirely, schedule cruises, view cruising history, and adjust live video and security preferences.
How to Use Alexa, Google Home, and Siri to Control Cleaning
Once your X60 is set up in the Dreamehome app, you can link it to your favorite voice assistant or just talk to it directly by starting with "OK, Dreame".
Amazon Alexa
Open the Dreamehome app, go to the Me tab, and tap Voice Control.
Tap Amazon Alexa > Not Linked.
Follow the on-screen instructions on Amazon login pages to complete the linking.
Google Home / Google Assistant
Start the Google Assistant binding process on your Google Home app.
Log back into the Dreamehome app when prompted to link your account with Google.
Give it a few seconds — you'll see a message confirming the binding was successful.
Choose your device and assign it to a room (or skip this step if you'd rather do it later).
Your device will now appear on your Google Home dashboard, ready for voice commands.
Siri (iOS Shortcuts)
Open the Dreamehome app, go to the Me tab, and tap Voice Control.
Tap Siri to open the Siri Shortcuts page.
Tap the + icon to create a new shortcut.
Select the device you want to control.
Record or type the phrase you want to use to trigger the command, then tap Finish.
With any of the three set up, you can start, pause, or send your robot home with a simple voice command, perfect for when your hands are full.
How to Activate Stain Detection?
Light-colored spills and pet fur can be tricky to catch. X60's proactive blue light reveals and analyzes them so the robot knows exactly where to focus. Just enable Active-Light Enhanced Detection under Laboratory Functions to get started.
How to Handle Obstacle Crossing?
Under Obstacle Crossing, you can toggle the feature on or off. When it's on, you can choose how the robot handles obstacles: let it decide automatically, force hurdle-style crossing (one leg first, then the other), or use synchronized dual-leg crossing.
How to Manage Dock Settings (Washing, Detergent, and Drying)?
Dock settings live under the main settings gear and cover the entire base station routine.
Wash Mop: smart mop washing, water level (water-saving, standard, or deep), and water temperature (from normal to high-temperature soaking)
Detergent: enabling detergent for mop washing and/or mopping, with separate tank settings (A/B)—tank A handles floor cleaning, while Tank B is dedicated to pet odor removal, which supports a higher-frequency setting
Dry: choose 2, 3, or 4 hours of mop drying, toggle auto mop drying, and set auto-empty frequency (off, standard, high, or low depending on how much dust and pet hair you're dealing with)
Hair compression: especially useful if you have a hairy household (lots of shedding pets, long hair, etc.)
Washboard base auto-clean: the washboard is the plate at the bottom of the dock that holds and washes the mop pads—this setting lets it self-clean to cut down on built-up grime and keep the whole process hands-freeHow to Do a Factory Reset?
How to Turn on Child Lock?
The Child Lock feature is located in the More Functions tab under Common Settings. Once enabled, the console buttons are locked when the robot is stationary. If the robot is actively operating, you can still press any button to pause it, so the lock doesn't block emergency stops mid-cleaning.
More Features
A grab-bag of smaller but useful toggles: voice prompts, do-not-disturb mode, always-on ring light, resume-cleaning mode, power-saving mode, and notifications. Battery settings also live here, including off-peak charging and charge limits, along with remote control (manual driving and camera tilt), Wi-Fi management, and tank draining.
3.Maintenance | Keep Your Robot in Top Shape
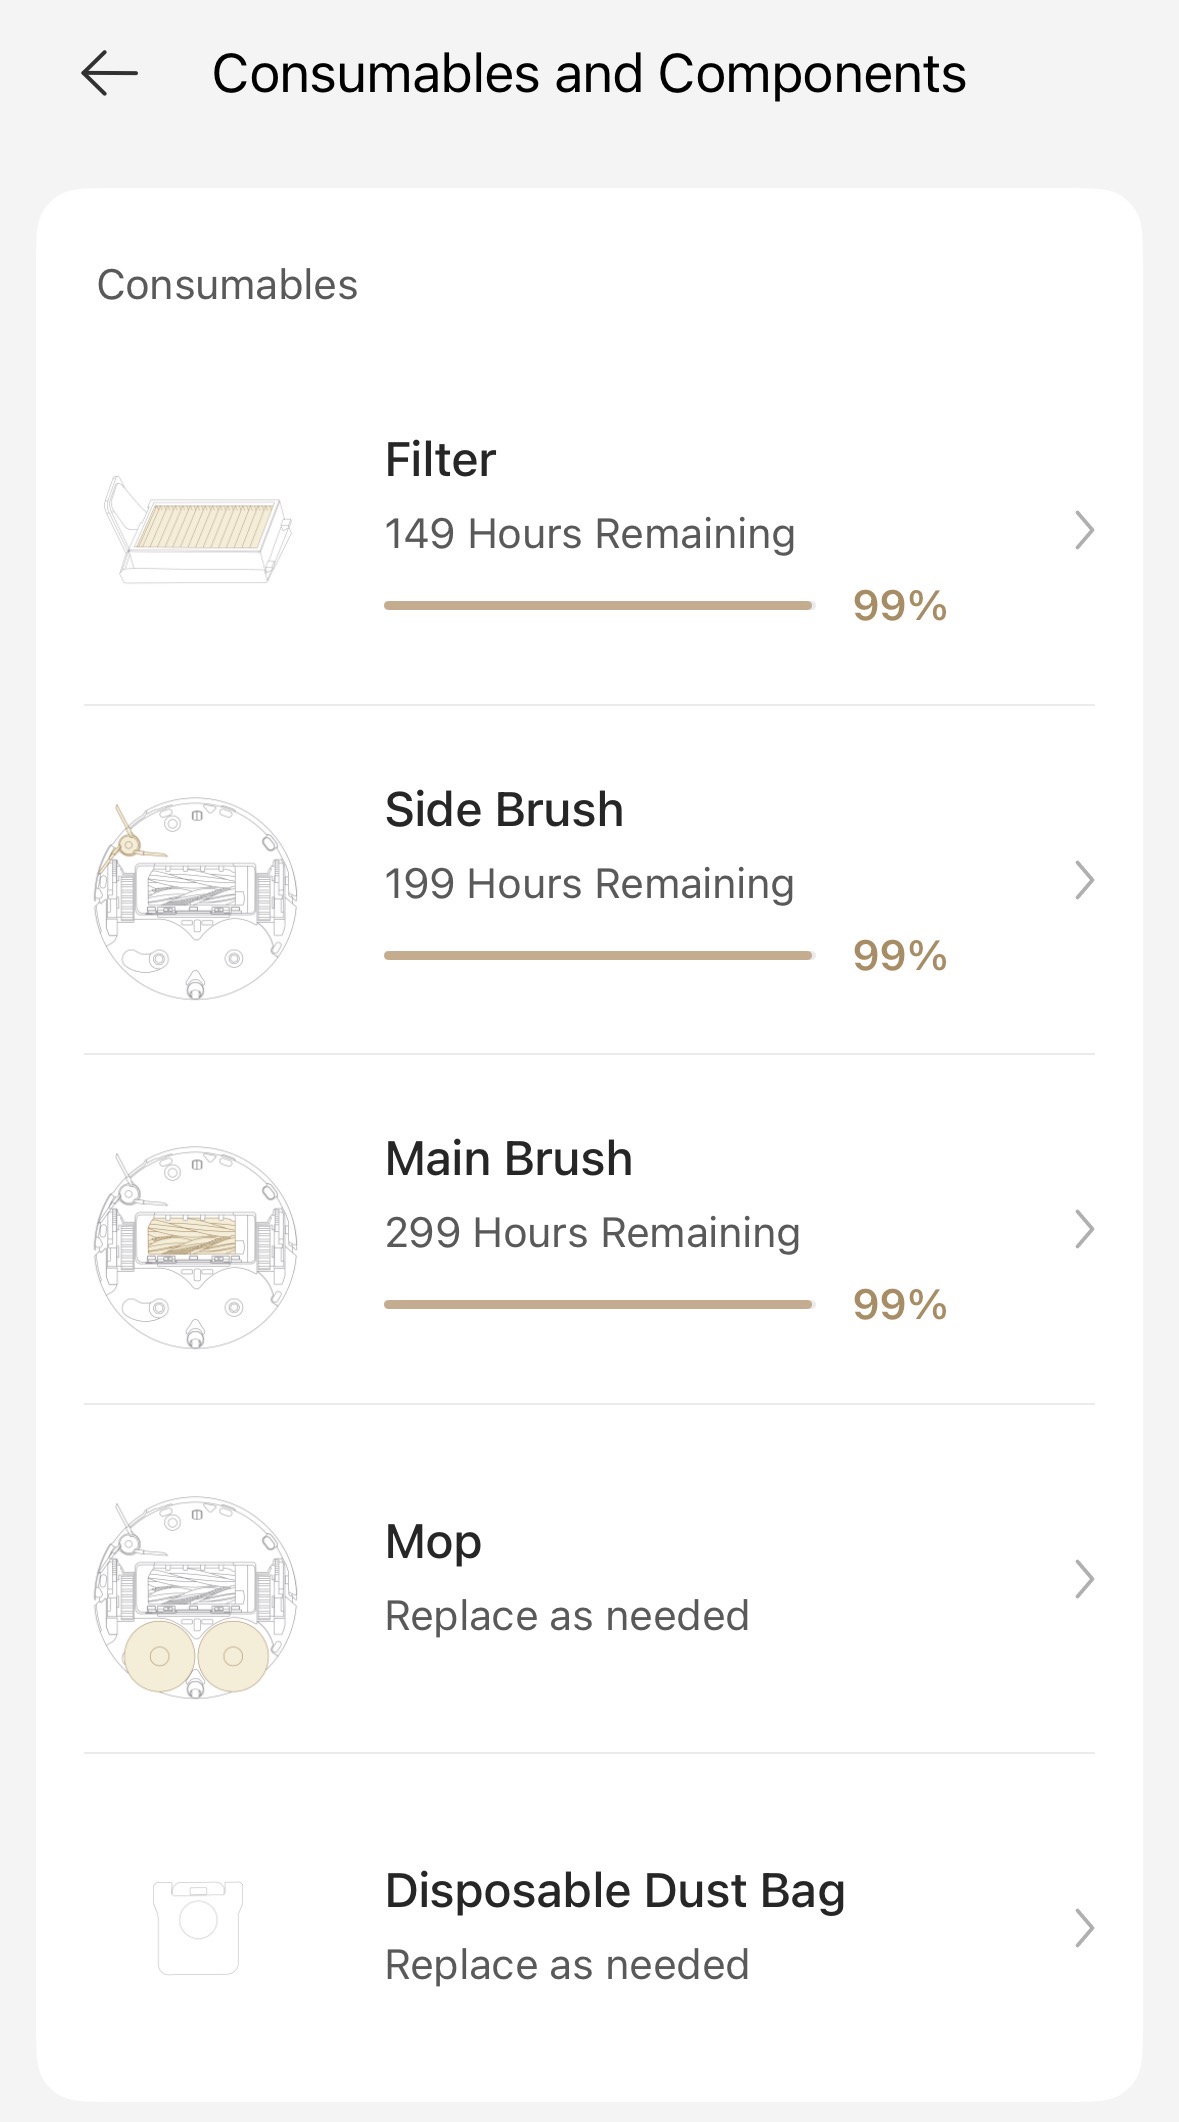
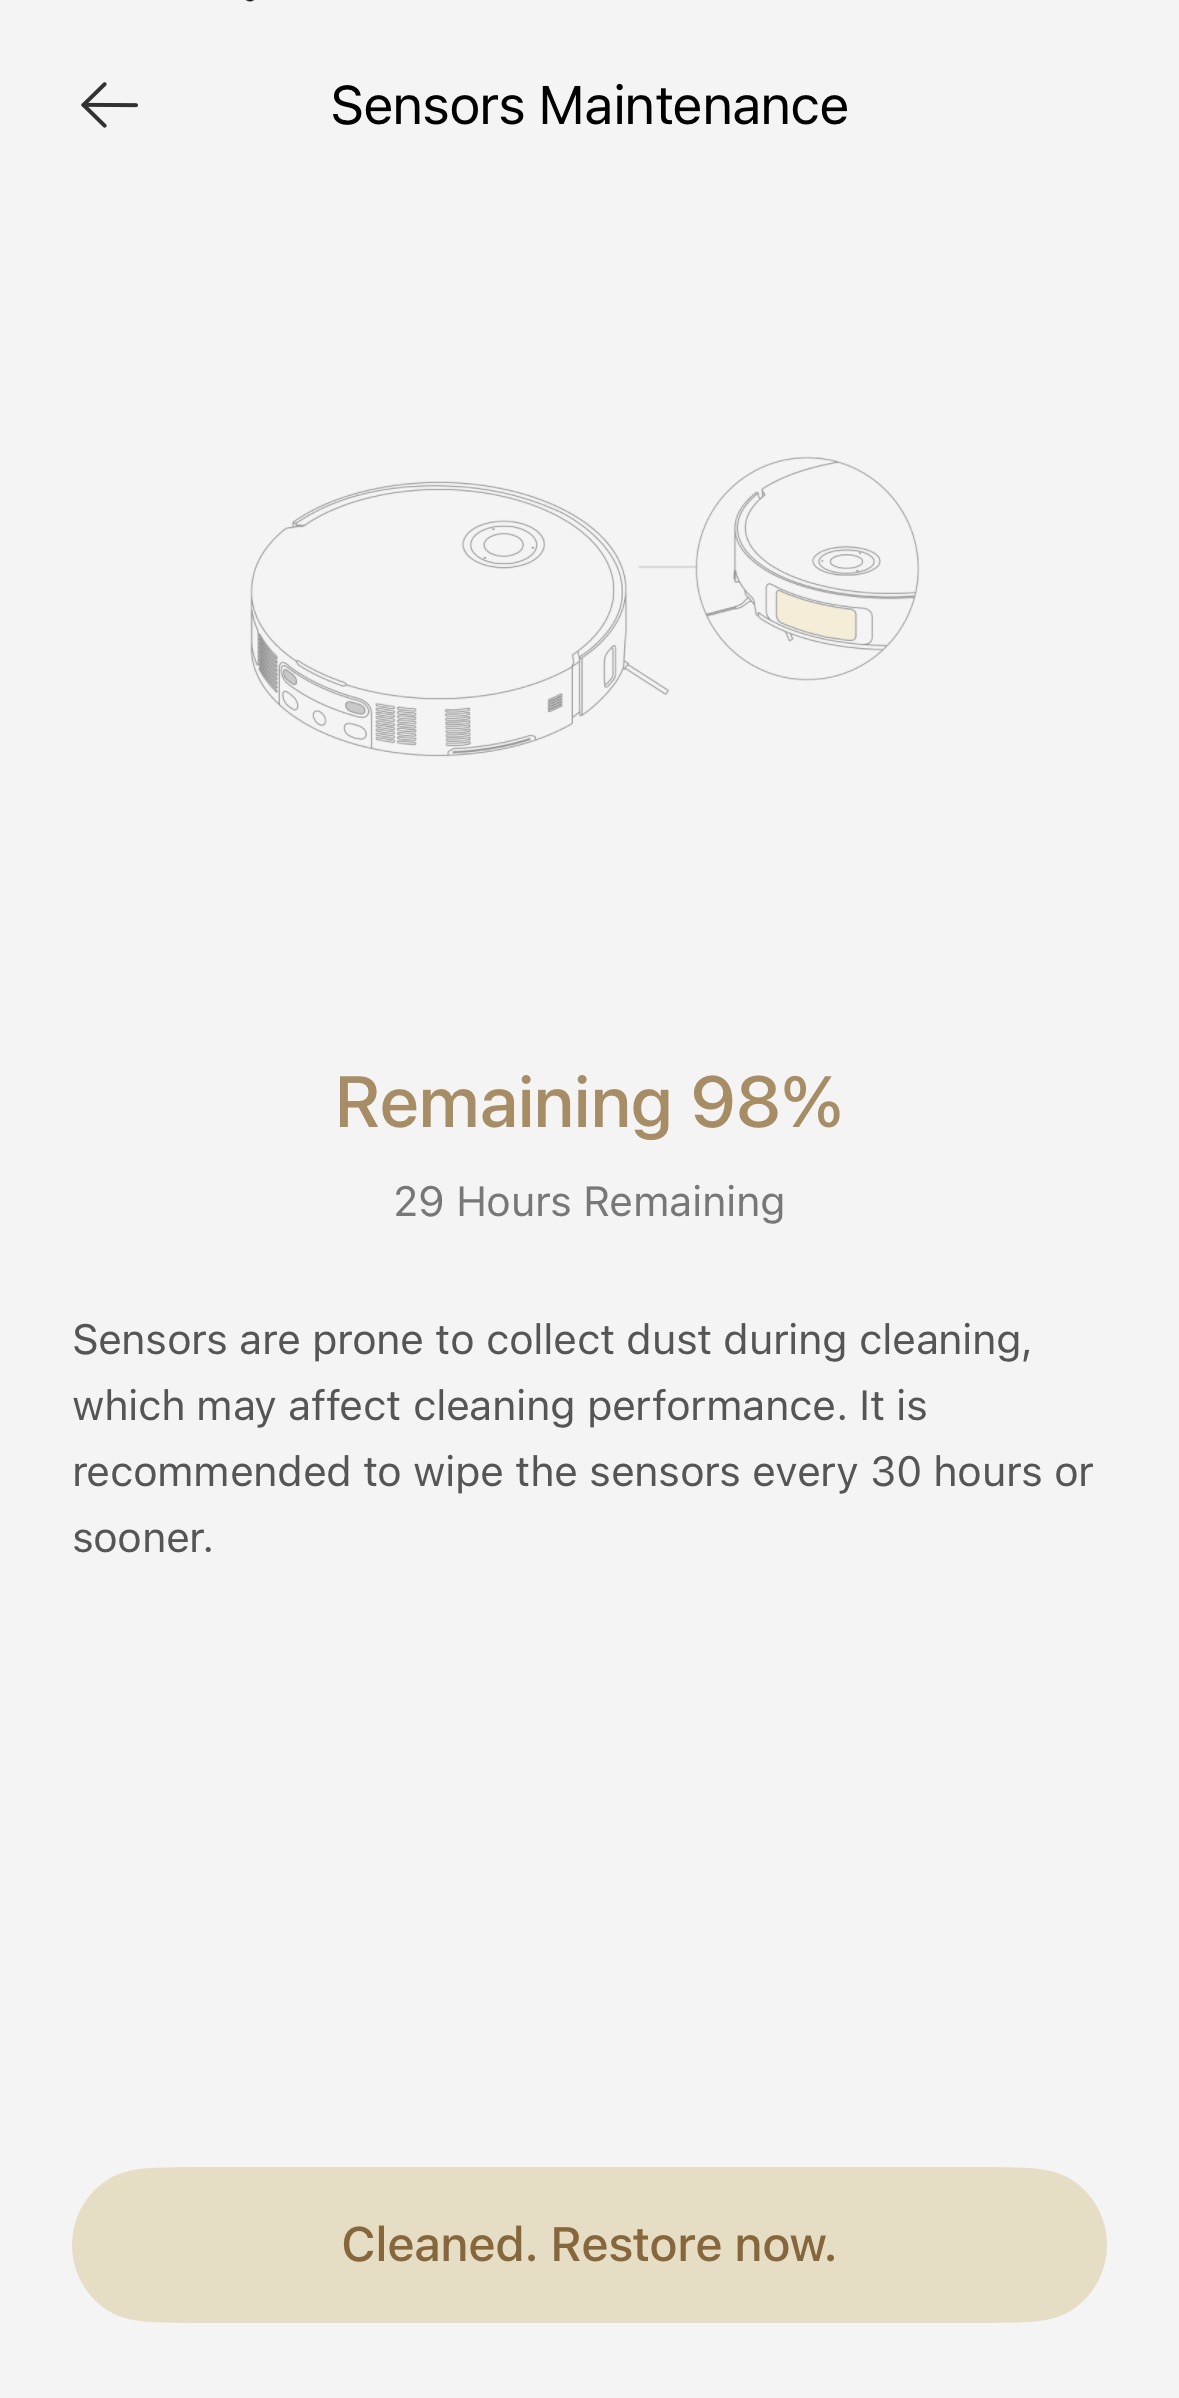
A maintenance dashboard that tracks the lifespan of every replaceable part and component, like the dust bag, and lets you know when it's time to swap something out or give a sensor a wipe-down. When an item's due, you'll get a notification prompting you to replace or reset it. For something like a sensor, once you've cleaned it, just tap the bottom button to restart the counter.
Dust Bag Replacement: A Quick 2-Minute Job
Keeping your station's vacuum bag fresh is a quick, mess-free task. Here's how to do it in a few simple steps.
1.Locate the vacuum bag The vacuum bag sits behind the cover on the station. Look for the two arrows at the bottom of the cover—grab there and pull to remove it. The cover itself is held on by four tabs at the top, so it comes off (and goes back on) easily.
2.Remove the old bag A full bag will look noticeably puffy. Once removed, you can open it to see just how much debris it's collected—the sealed design keeps everything contained, so you can carry it to the trash without spilling dust and debris back into your home. If you notice any leftover debris in the compartment, a quick blast of compressed air (or a gentle blow) will clear it out.
3.Insert the new bag Line up the gray edge of the new bag and press it gently into place. Don't forget the small black tab — the square cutout on the cover needs to fit through it when you reattach the cover.
4.Reattach the cover The cover only fits one way, so use the arrow marking (which faces the solution tank side) as your guide for the bottom. Line up the tabs at the top first, then gently press the rest of the cover into place.
Adding Cleaning Solution: What to Use and How Much
X60 Max Ultra Complete uses a dual-solution tank while X60 Ultra uses a single-solution tank. Here's how to fill it up so you don't have to add solution to the big clean water tank before every clean.
1.Locate the solution tank Find the removable cover on the station—grip the two arrows, and gently pull the cover toward you. This reveals the solution tank underneath.
2.Identify Tank A and Tank B & Fill Up Solution On X60 Max Ultra Complete, the tank is clearly labeled A and B, each with its own icon (look for the paw print marking Tank B).
Tank A is for your general-purpose cleaner.
Tank B is for specialty solutions like pet odor cleaner, marked with the paw print.
Reassemble Slide the tank back into place, then reattach the cover. Line up the four tabs at the top first, and gently press the rest of the cover into place.
Dock Self-Cleaning: What It Does & When to Intervene
Keeping your station in top shape doesn't take much. A few quick checks after each clean will keep performance consistent and odors at bay.
-
Clean and Used Water Tanks Open the top cover to access both tanks.
·Clean water tank: Just refill it once it's empty. Rinsing it out occasionally is optional, but not required.
·Dirty water tank: This one needs more attention. We recommend emptying it after every use. Leaving dirty water sitting for even a couple of days can lead to a foul odor.
·Check the tank inlets and outlets for clogs, and don't forget the small drain hole in the bottom corner. Keep it free of obstructions too.
Solution Tank Just keep the tank filled, and wipe down the compartment if needed.
Vacuum Bag/Dust Bag Right next to the solution tank is your vacuum bag compartment. When the dust bag is full, dispose of it, and clear any leftover debris inside the compartment.
Mop Pad Washing Area/Washboard Filter
While you're there:
Check the charging and communication sensors to keep them clean.
Keep an eye on the water inlet nearby.
Check the self-empty pathway and the air venting area for hair buildup that could block airflow.
At the very bottom, keep the water drain (used during the wash cycle) clear of debris. A clog here can trigger an error message.
Dust Box and HEPA Filter: Cleaning, Drying & When to Replace
The dust box and filter play a big role in keeping suction strong and your robot running smoothly. The HEPA filter captures the vast majority of dust, dirt, pet hair, and small particles, keeping that debris from recirculating back into your home's air. Skipping regular cleaning here can lead to a few issues down the line: reduced suction, musty odors from debris buildup, and in some cases, extra strain on the motor that can cause overheating or errors. A little regular maintenance goes a long way.
How to Clean
Place the robot vacuum flat on the floor. Remove the maintenance cover on top of the robot and lift out the dust box.
Open the dust bin and empty out the dirt.
Remove the filter and gently tap it to remove dust and other debris.
Rinse the filter under clean running water.
Allow the filter to air-dry for 24 hours in a well-ventilated area.
Reinstall the filter and dust box back into the robot vacuum.
Maintenance Frequency
Every 2 weeks: Rinse the dust box and filter with clean water, and clean out the filter frame and air outlet.
Every 3 to 6 months: Replace the HEPA filter. Rinsing keeps it surface-clean, but it won't fully restore filtration performance over time. If you're dealing with pets or heavy shedding, aim for the 3-month mark instead of 6.
Brush Maintenance: Remove Hair Tangles
The main brush does most of the heavy lifting on your robot—agitating carpet fibers and sweeping up hair and debris as it goes. When it's neglected, you'll usually notice it before anything else: hair tangling around the bearings, the brush jamming, louder-than-usual noise, uneven cleaning on one side, or the unit running warmer than it should. A little regular attention keeps all of that from happening in the first place.
How to Clean
Remove the brush cover and lift out the roller brush.
Check the bearings at both ends and the gaps around the shaft, since that's where hair tends to wrap and tangle. Use scissors or tweezers to cut through any tangled hair, then peel it away.
Clean out the brush compartment itself, clearing any leftover dust, debris, or thread, and wipe down the bearings and mounting slots so nothing gets caught when you reinstall.
Before putting it back, spin the brush by hand to make sure it moves freely with no sticking. Then line it up with the mounting slot, reinstall it, and snap the cover back on.
Maintenance Frequency
For heavy-shedding homes: If you notice hair starting to build up on the brush, it's an easy fix; just pull it out and clear it off. No need to check it every time, but it's worth a glance now and then if shedding is a regular thing in your house.
If you hear an unusual noise mid-clean, don't wait; pause the robot right away and check the brush for anything stuck.
Every 2 weeks: Remove the brush fully and give it a deeper clean, including the bearings.
Every 6 to 12 months: Replace the brush. Households with pets or heavy shedding should lean toward the 6-month mark to keep cleaning performance consistent.

Comments
0 comments
Please sign in to leave a comment.